Category: Complete Shower Restorations

Real-world before and after case studies showcasing professional shower restoration, grout cleaning, and tile repair services throughout the Greater Sacramento Valley area.

  • 26-Year-Old Tub Shower Restoration in Elk Grove, CA: Grout Repair, Moldy Caulk & Hard Water Stains

    26-Year-Old Tub Shower Restoration in Elk Grove, CA: Grout Repair, Moldy Caulk & Hard Water Stains

    A homeowner in Elk Grove contacted Grout Repair Pro because their 26-year-old tub/shower had developed moldy silicone caulk, heavy hard water buildup on the glass, stained grout, and years of surface wear. They wanted to restore the existing shower rather than replace the tile if the underlying installation was still in good condition.

    Project Overview

    • Location: Elk Grove, CA
    • Project Type: Shower Restoration / Grout Repair / Caulk Replacement
    • Age of Shower: 26 years
    • Issues Addressed: Moldy silicone caulk, localized grout deterioration, hard water mineral deposits, and tub surface staining
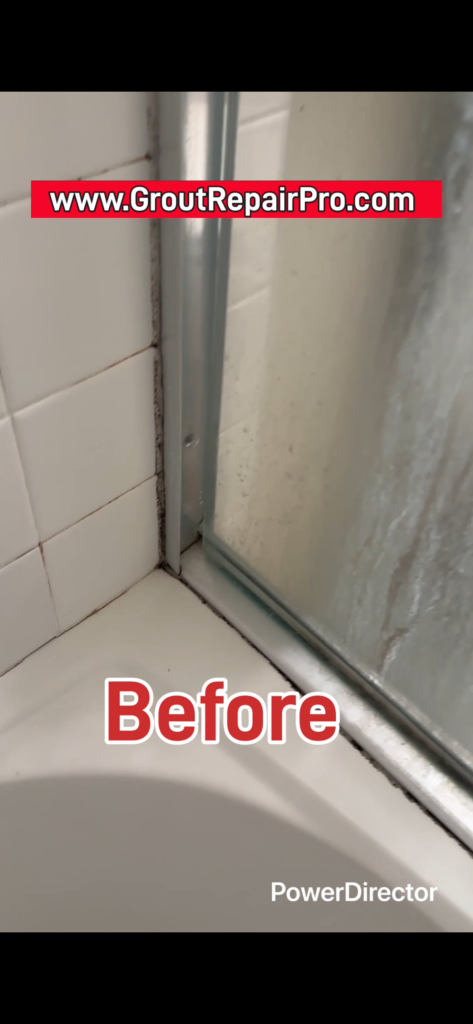
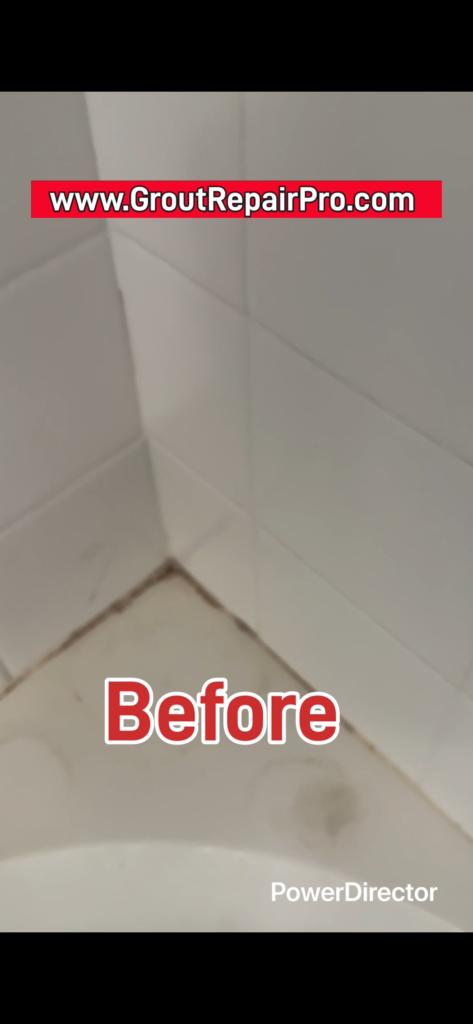
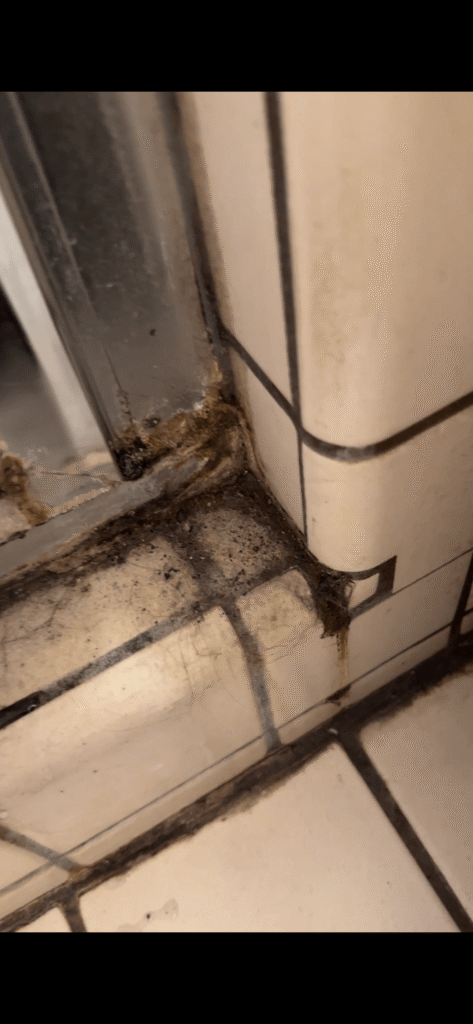
    Mold accumulation at failed silicone joint between bathtub and tile wall
    Before restoration: failed silicone caulk with visible mold growth at the tub-to-tile transition.
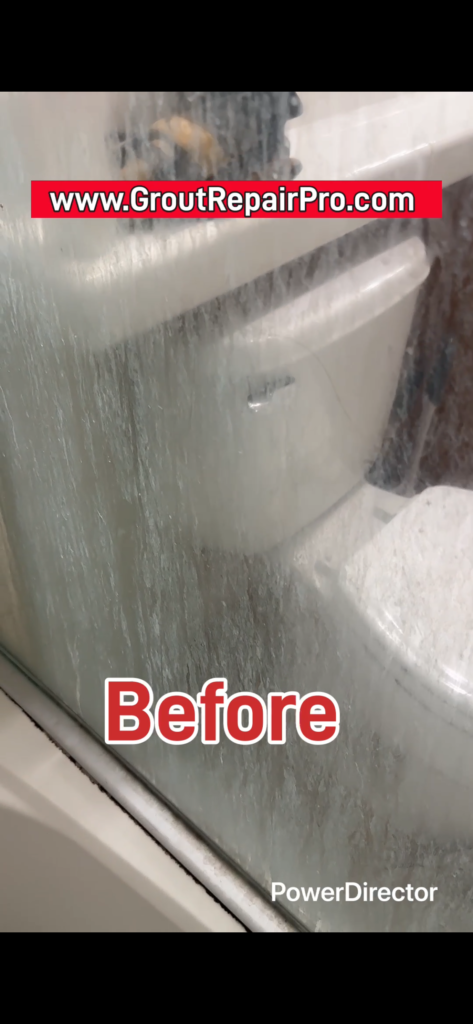
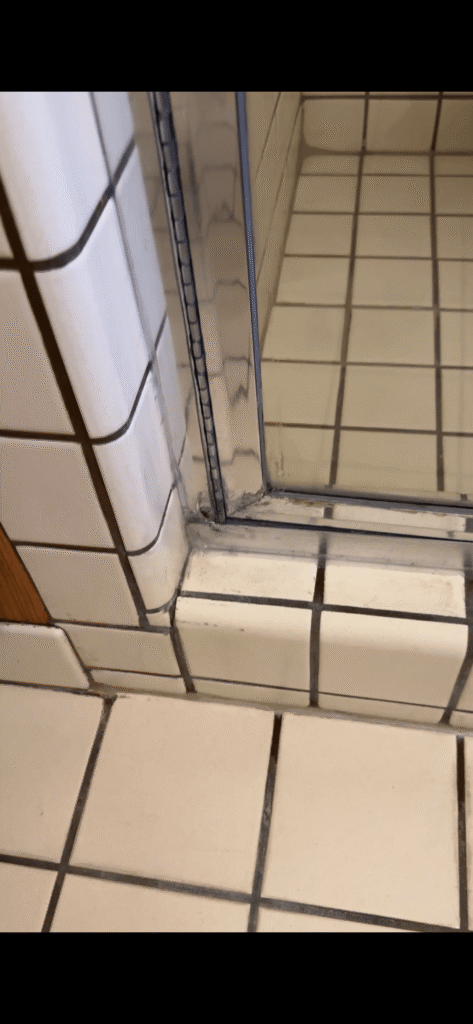
    Heavy hard water and soap scum buildup on shower glass enclosure.
    Before: Significant hard water mineral deposits and soap scum on the lower shower glass.
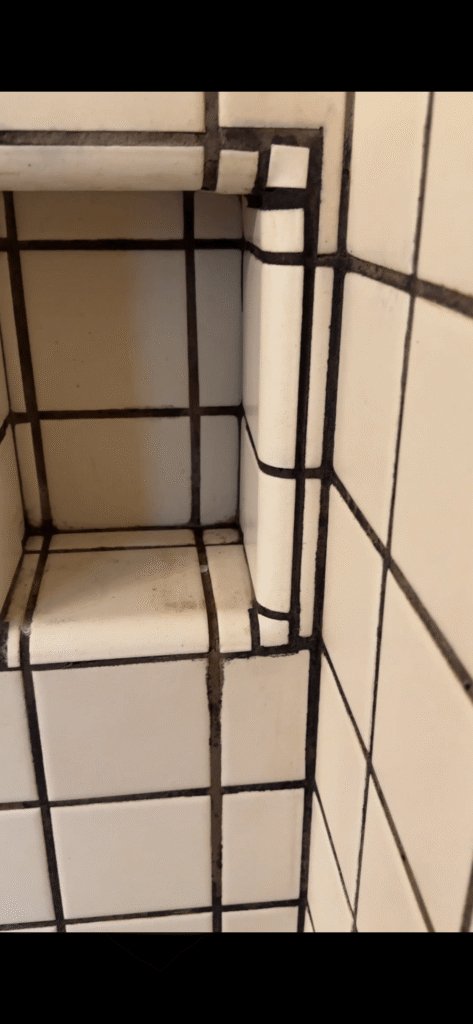
    Stained tub ledge and deteriorated grout around the shower soap dish.
    Before: Persistent product staining on the tub ledge and grout wear near the soap dish.

    During the evaluation, I found that the shower was a good candidate for restoration. The tile installation was still functional, but several areas showed signs of aging and required targeted repairs.

    Issues Identified During the Initial Evaluation

    This 26-year-old tub/shower had several issues that developed over decades of daily use. While mold growth, grout wear, and mineral buildup are common in older showers, this installation had several specific areas that required attention.

    Mold Growth at the Tub-to-Tile Transition

    The primary concern was mold accumulation along the lower tub-to-tile joint. The original silicone caulk had aged and was no longer providing a clean, maintainable surface in an area exposed to frequent moisture.

    Calcium Deposits on Shower Glass

    The glass enclosure had significant mineral buildup from years of hard water exposure. The lower sections of the glass showed the heaviest deposits where water remained after shower use.

    Long-Term Product Staining on the Tub Surface

    One unique issue with this shower was the staining left behind from years of shampoo and personal care products sitting on the tub ledge. Over time, repeated exposure to these products created stubborn discoloration that could not be removed through normal cleaning.

    Localized Grout Wear Around the Soap Dish

    The grout damage was not throughout the entire shower. The most noticeable deterioration was around the soap dish and corner areas where moisture exposure and movement commonly affect grout joints.

    How We Restored This Shower

    Restoring this tub/shower required a combination of deep cleaning, surface restoration, targeted repairs, and new sealant work. Because the shower structure was still sound, the goal was to restore the existing installation rather than replace the tile.

    Glass Restoration and Mineral Deposit Removal

    Because mineral deposits can bond tightly to glass surfaces over time, this process required more than standard household cleaning methods.

    Shower Door Track Cleaning and Mold Removal

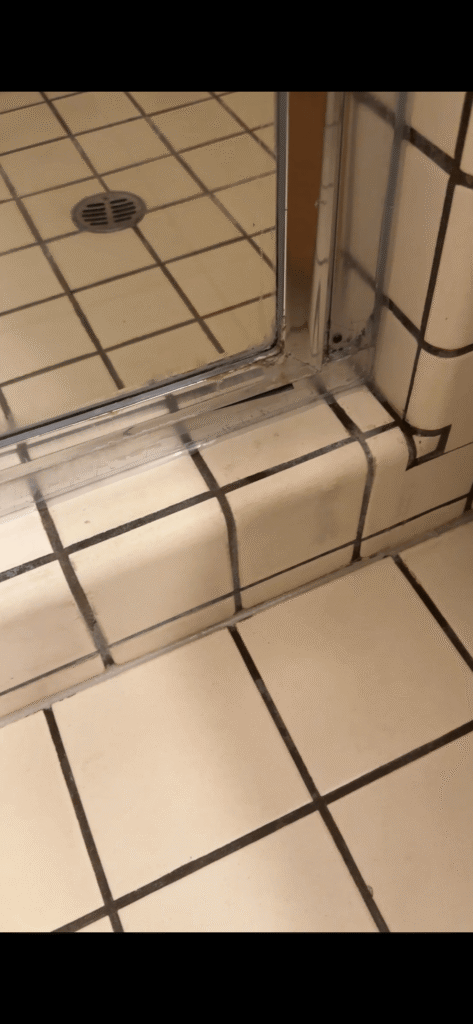
    The bottom door tracks were removed to access areas that are normally difficult to clean. This allowed us to remove trapped moisture, buildup, and mold from beneath the tracks before restoring and resealing the area.

    Grout Repair and Tile Restoration

    The deteriorated grout areas around the soap dish and corners were repaired. An epoxy grout was used in the soap dish area to provide a durable, stain-resistant repair in a high-use location.

    Silicone Caulk Replacement

    The failed silicone at the tub-to-tile transition was removed and replaced with new 100% silicone to create a clean, finished joint.

    The Results

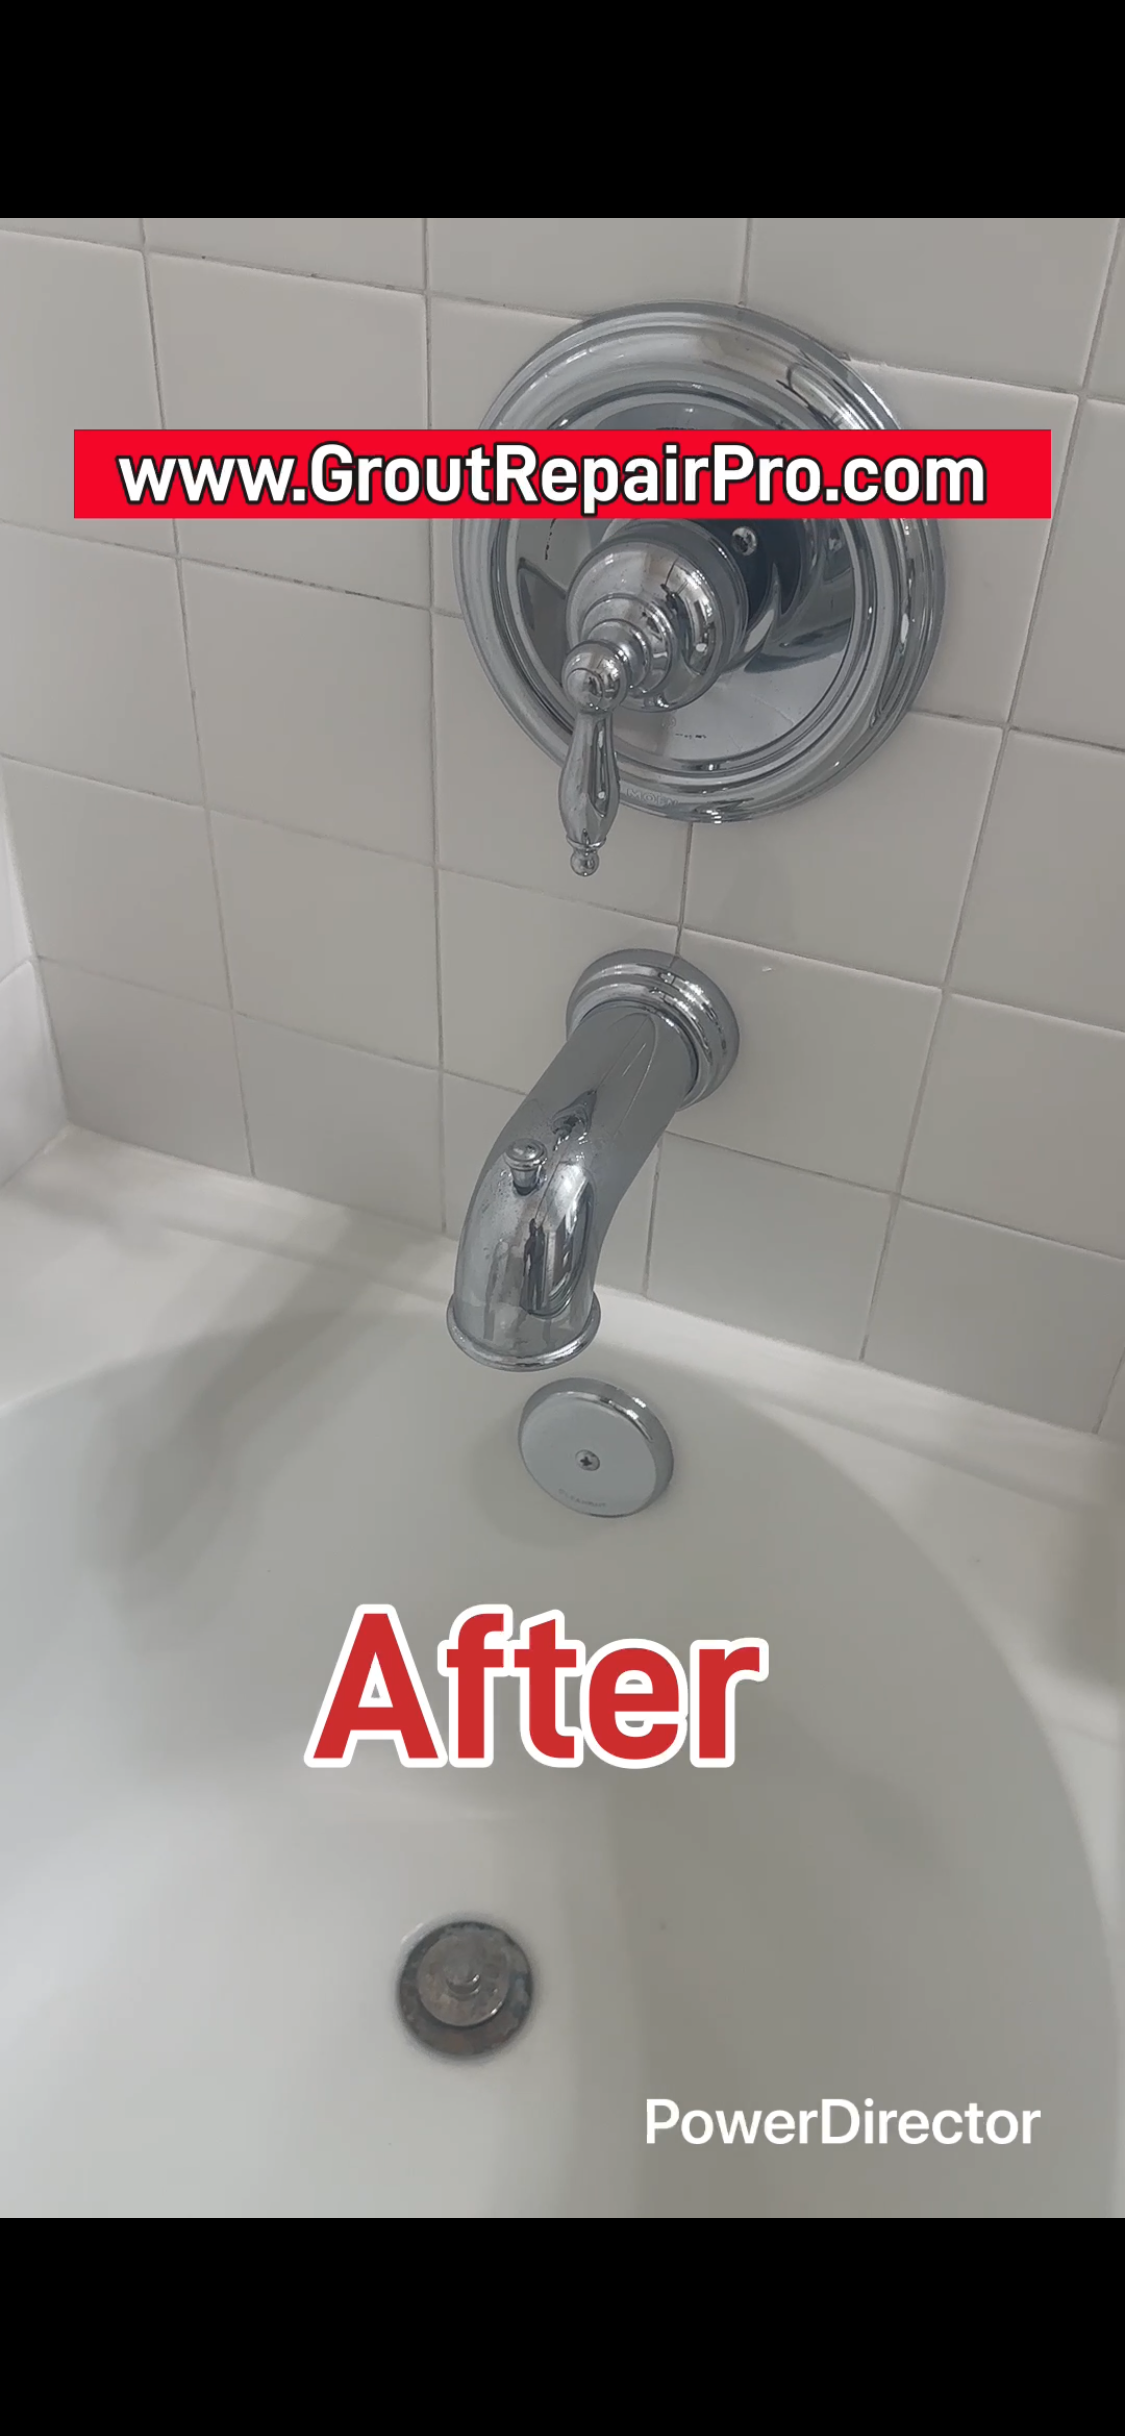
    After restoration, the tub/shower was transformed from a difficult-to-maintain 26-year-old enclosure into a clean, refreshed, and functional space. The failed silicone was replaced, mineral buildup was removed from the glass, damaged grout areas were repaired, and the shower was restored without the cost and disruption of tile replacement.
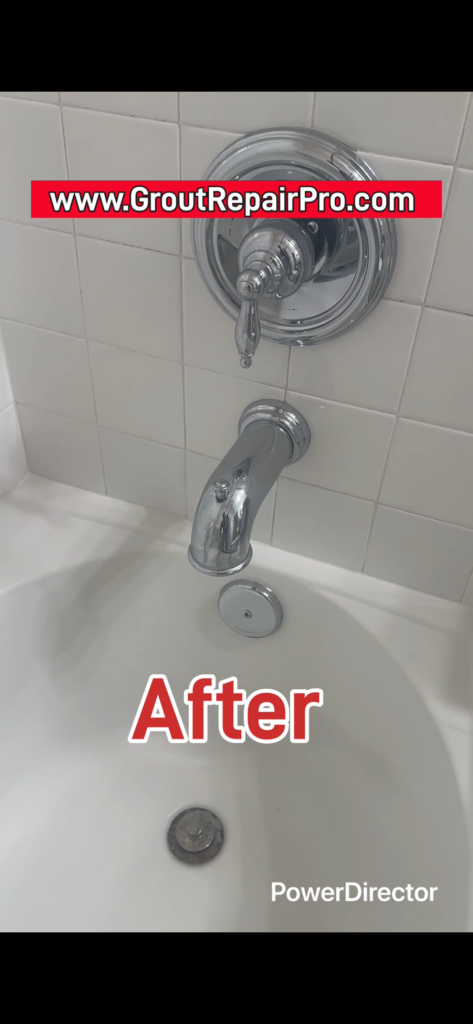
    Fully restored tile shower in Elk Grove after professional mold removal and resealing.
    After: A clean, refreshed, and watertight shower restored without the cost of a full remodel.
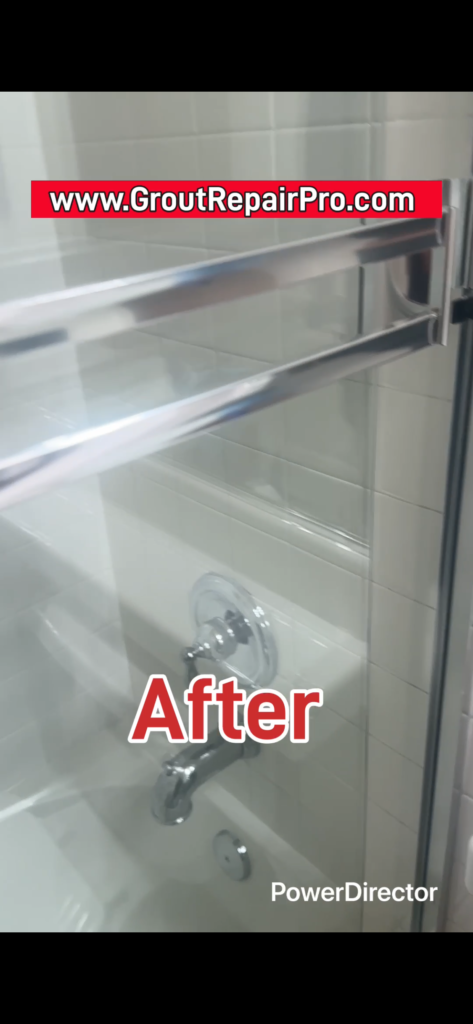
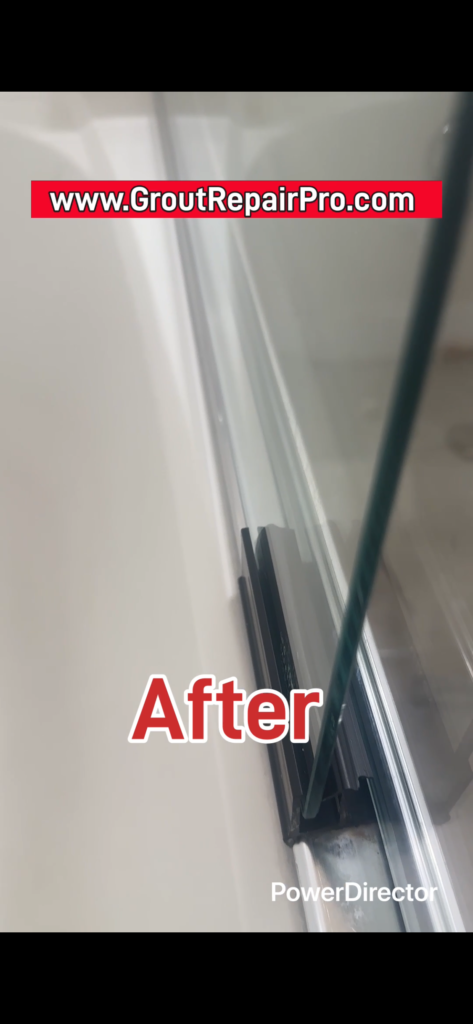
    Clear shower glass door after hard water mineral deposit removal.
    After: Crystal clear shower glass following our deep cleaning and restoration process.
    Epoxy-grout repair at tile and tub intersection in a restored shower enclosure.
    Tub and tile joint area repaired with durable, stain-resistant epoxy grout.

    The homeowner was pleased with the improvement and was provided with the Grout Repair Pro Maintenance Guide to help care for the restored shower and reduce future mold and mineral buildup.

    Shower Maintenance Recommendations

    To help extend the life of this restoration, the homeowner was provided recommendations for drying the shower, maintaining silicone joints, and reducing mineral buildup on the glass.

    Frequently Asked Questions

    Can an old tile shower be restored instead of replaced?

    Many older showers do not need complete replacement. If the tile installation is still structurally sound, restoration can often address failing caulk, grout deterioration, staining, and surface buildup while preserving the existing tile.

    Can moldy shower caulk be cleaned or does it need to be replaced?

    In many cases, once silicone caulk has developed deep mold discoloration, cleaning products will only provide a temporary improvement. If mold has penetrated the silicone or the caulk has separated from the surface, replacement is usually the better long-term solution.

    Can hard water stains be removed from shower glass?

    Heavy calcium deposits often cannot be removed with normal household cleaners. The method required depends on the severity of the buildup and the condition of the glass.

    Grout Repair Pro provides shower restoration, grout repair, and silicone replacement services throughout Elk Grove and the surrounding Greater Sacramento Valley area.

    Need Help With Your Shower?

    If your shower has similar problems with grout, caulk, hard water buildup, or staining, contact Grout Repair Pro to schedule an evaluation at 916.600.2009
  • Case Study: Restoring a 40-Year-Old “Hot Mop” Shower in Sacramento

    Case Study: Restoring a 40-Year-Old “Hot Mop” Shower in Sacramento

    When a homeowner reached out for a professional shower restoration in the Sacramento area, they were at their wits’ end. Their 40-year-old shower had become impossible to keep in a healthy, sanitary state. They had already tried several different retail cleaners with zero success because the issues weren’t just on the surface—the mold had deeply penetrated the system.

    Here is how we used our specialized 6-Step Restoration Process to save this classic shower, eliminate the health hazards, and save the client thousands of dollars compared to a $20,000 full remodel.

    The Diagnostic: Anatomy of a 40-Year-Old Shower

    Older showers built around a traditional “Hot Mop” waterproofing system operate on a “water-in, water-out” design. Because conventional cement grout is naturally porous, water saturates the tile floor and sits on top of the sub-surface waterproofing membrane.

    On this specific job, we diagnosed several critical failure points:

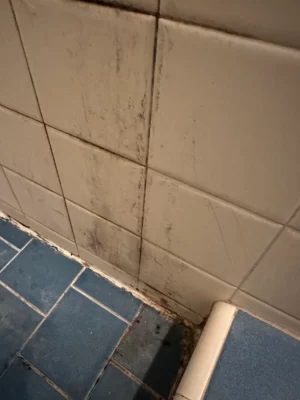
    The 3/16″ Spread Grout Joints: The 4-inch square tiles featured wide 3/16-inch joints. Over four decades, these wide, porous cement joints became a massive breeding ground for deep-seated mold.

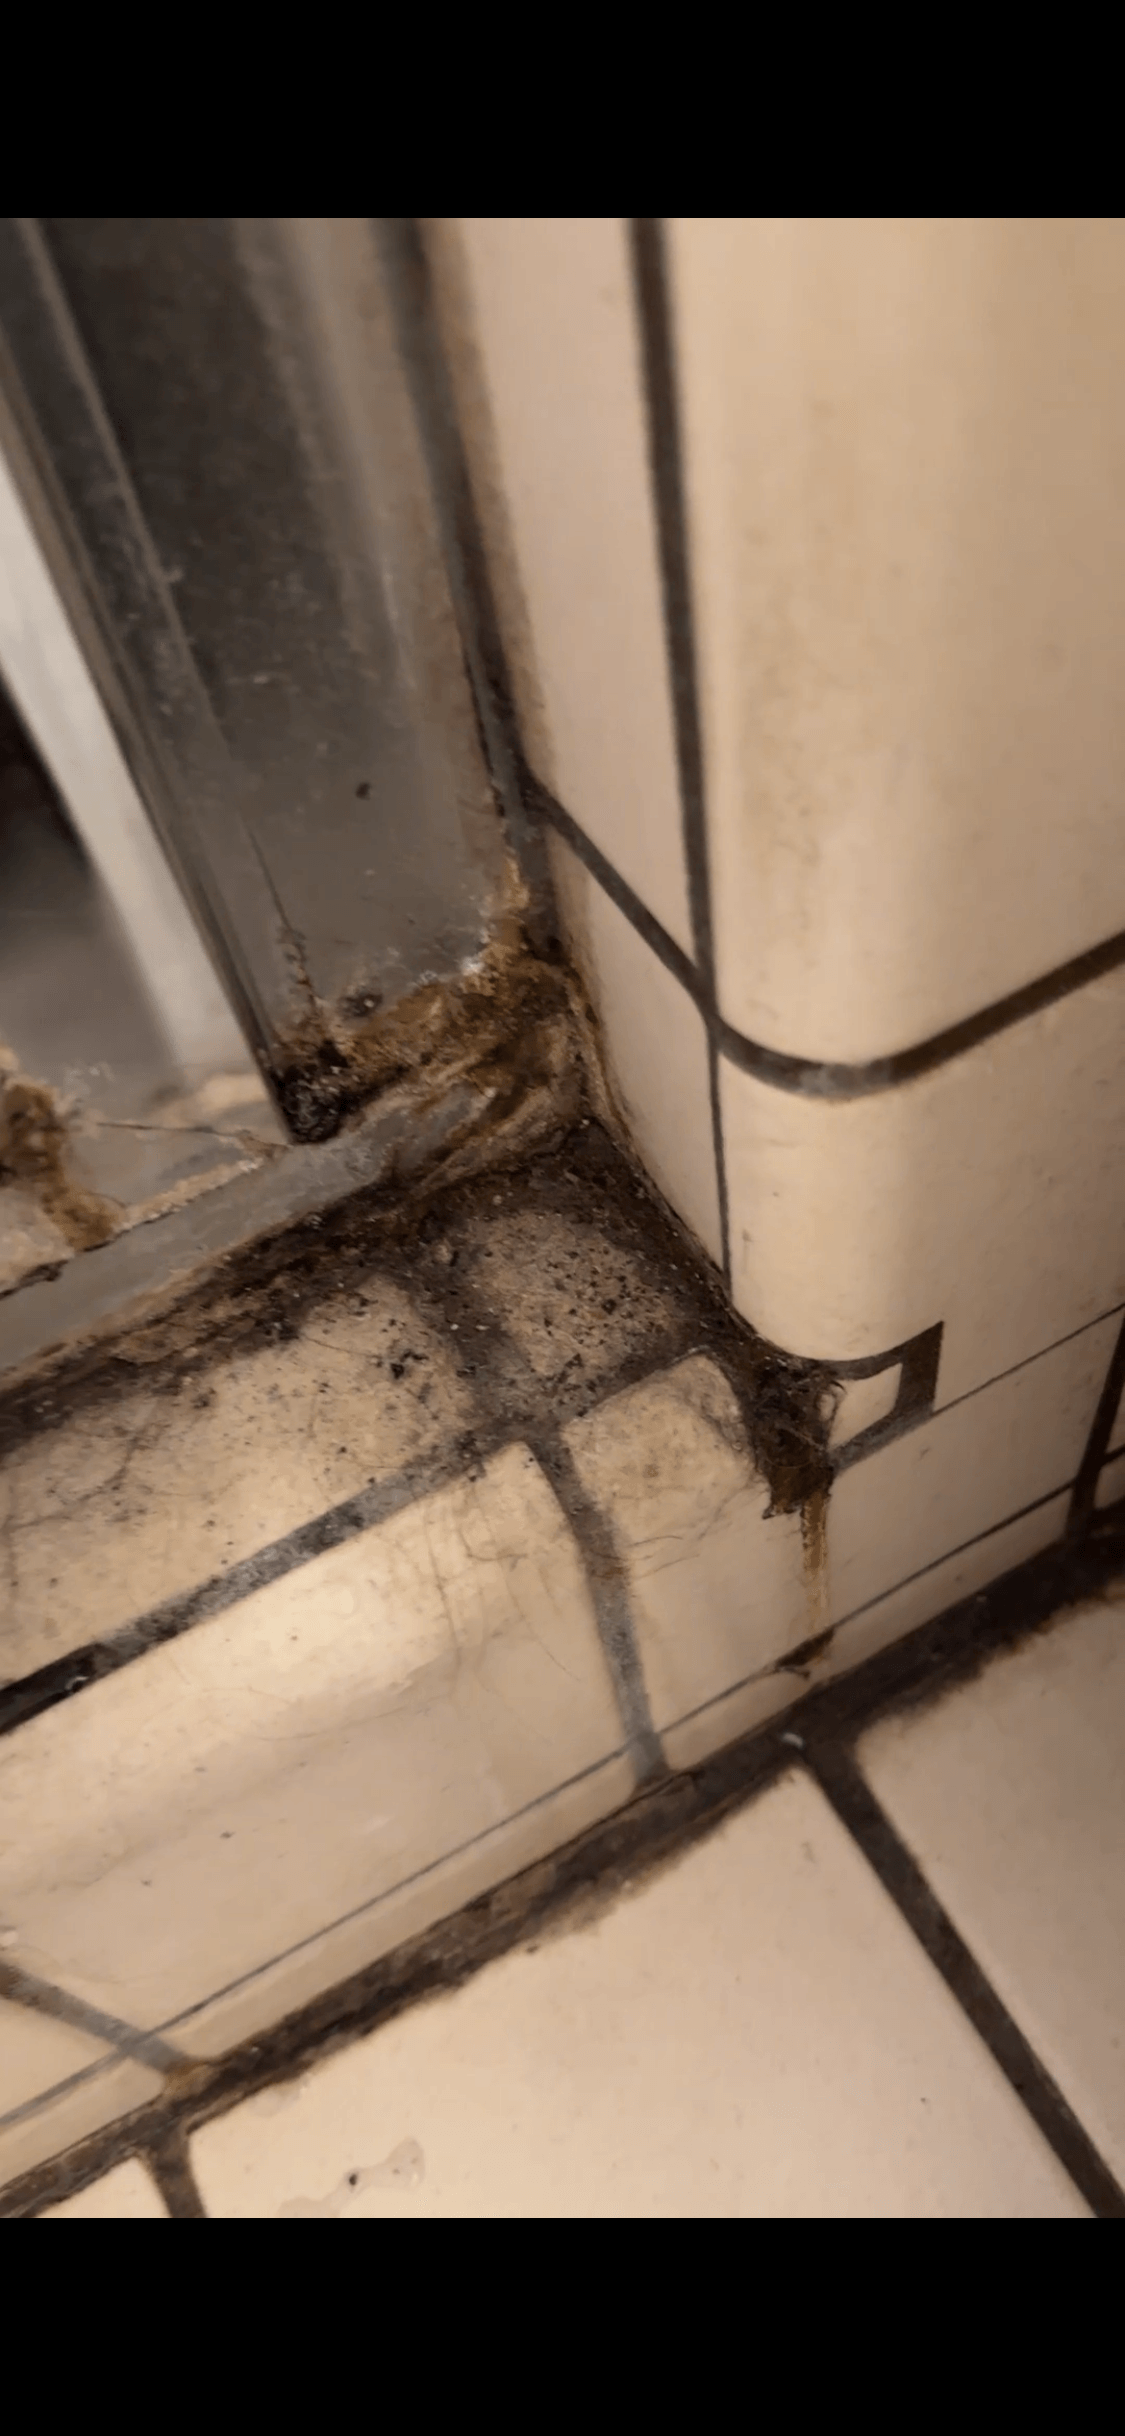
    Stained and Failed Silicone: The glass enclosure silicone was completely infested with mold. Once mold embeds itself inside silicone, the material is permanently stained and must be entirely cut out and replaced.

    Clogged Weep Holes: A critical red flag in hot mop systems. Weep holes are located 2 inches down inside the drain assembly. If they get choked with debris, the subsurface water gets trapped. This stagnant water creates a constant vapor drive that forces mold up through the grout lines and destroys the installation from the inside out.

    Our 6-Step Shower Restoration Process in Action

    This project required nearly 8 hours of highly targeted technician labor to properly execute our signature protocol:

    1. Advanced Mold Remediation
      We applied a commercial-grade remediation product that kills mold spores within 60 seconds. Due to the deep contamination in the 3/16″ spread joints, this required multiple sequential applications to completely neutralize the subsurface growth.
    2. Mechanical Grout Preparation
      Surface washing isn’t enough. We utilized specialized stainless steel brushes to physically scrub and grind away the top layer of damaged, mold-stained cement grout. This exposed a completely fresh, stable layer of clean grout underneath without risking rust stains from inferior metal tools.
    3. Glass Enclosure Restructuring
      All old, mold-compromised silicone around the glass enclosure and tile transitions was mechanically removed. We thoroughly sanitized the tracks and prepped the channels for re-sealing.
    4. Drain & Weep Hole Clearing
      We stripped out the drain cover and excavated accumulated debris exactly 2 inches below the shower floor level. Clearing these vital weep holes instantly restored the “water-in, water-out” functionality, ensuring the pan can drain completely and dry out between uses.
    5. High-Performance Grout Repair
      For all structural grout repairs, we don’t use standard cement base. We packed the joints with 100% epoxy grout. 100% epoxy is completely waterproof, chemically resistant, and structurally far superior to cement.
    6. 100% Silicone Perimeter Seal
      We sealed all movement joints and glass transitions using premium 100% silicone. This provides a highly flexible, completely watertight seal that won’t shrink or break down like cheap acrylic caulks.

    The Hard Truth About Grout Sealers & Mold

    There is a massive misconception among homeowners that grout sealers make grout waterproof or mold-proof. This is completely false.

    By design, grout needs to “breathe” to allow vapor and subsurface moisture to escape. Penetrating sealers are engineered specifically to allow this breathability process to happen, meaning it is physically impossible for a sealer to make cement grout waterproof.

    Furthermore, epoxy grout is not immune to mold—and the reality is, nothing is. If organic matter like soap scum and skin cells sits on a surface with moisture, mold will grow on it, whether it’s plastic, tile, cement, or epoxy.

    Cure Time & Return to Service: The shower was fully prepped, executed, and delivered in under 8 hours. The shower was cleared for full use exactly 24 hours later to allow the advanced 100% epoxy grout and 100% silicone to fully cure and achieve maximum strength.

    Pro Tips for Maintaining an Older Shower

    At the final walkthrough, we always leave our Sacramento area clients with a clear roadmap to keep their restored shower looking pristine without spending hours scrubbing:

    The 5-Minute Maintenance Rule: The absolute key to protecting your professional shower restoration and stopping mold from returning is to maintain and clean your shower every two weeks. You don’t need heavy chemicals or intense scrubbing. All it takes is a purpose-made grout cleaner that is safe on grout, a small nylon grout brush, and 5 minutes of your time.

    The Ultimate Key: Dry It Out: The single most effective thing you can do is get that shower to dry out completely before the next use. Just a reality—mold cannot survive without moisture. Tips like running an exhaust fan longer or utilizing a quick squeegee after the final shower of the day dramatically cuts down the humidity levels that spores need to activate.

    Understand Stained Silicone: If you see black mold spots creeping behind or inside your silicone, surface sprays won’t fix it. The silicone is permanently damaged and requires professional replacement.

    For a deeper dive into the specific products we recommend, step-by-step instructions on how to use them, and how to check your tile for invisible soap scum to make sure you are cleaning thoroughly, check out our dedicated FAQ Section.

  • Case Study: 36-Year-Old Shower Restoration in Sacramento

    Case Study: 36-Year-Old Shower Restoration in Sacramento

    When a homeowner reached out for a professional shower restoration in the Sacramento area, they were at their wits’ end. Their 36-year-old shower had become impossible to keep in a healthy, sanitary state. They had already tried several different retail cleaners with zero success because the issues weren’t just on the surface—the mold had deeply penetrated the system.

    Here is how we used our specialized 6-Step Restoration Process to save this classic shower, eliminate the health hazards, and save the client thousands of dollars compared to a $20,000 full remodel.


    The Diagnostic: Anatomy of a 36-Year-Old Shower

    Older showers built around a traditional “Hot Mop” waterproofing system operate on a “water-in, water-out” design. Because conventional cement grout is naturally porous, water saturates the tile floor and sits on top of the sub-surface waterproofing membrane.

    On this specific job, we diagnosed several critical failure points:

    • The 3/16″ Spread Grout Joints: The 4-inch square tiles featured wide 3/16-inch joints. Over four decades, these wide, porous cement joints became a massive breeding ground for deep-seated mold.
    • Stained and Failed Silicone: The glass enclosure silicone was completely infested with mold. Once mold embeds itself inside silicone, the material is permanently stained and must be entirely cut out and replaced.
    • Clogged Weep Holes: A critical red flag in hot mop systems. Weep holes are located 2 inches down inside the drain assembly. If they get choked with debris, the subsurface water gets trapped. This stagnant water creates a constant vapor drive that forces mold up through the grout lines and destroys the installation from the inside out.

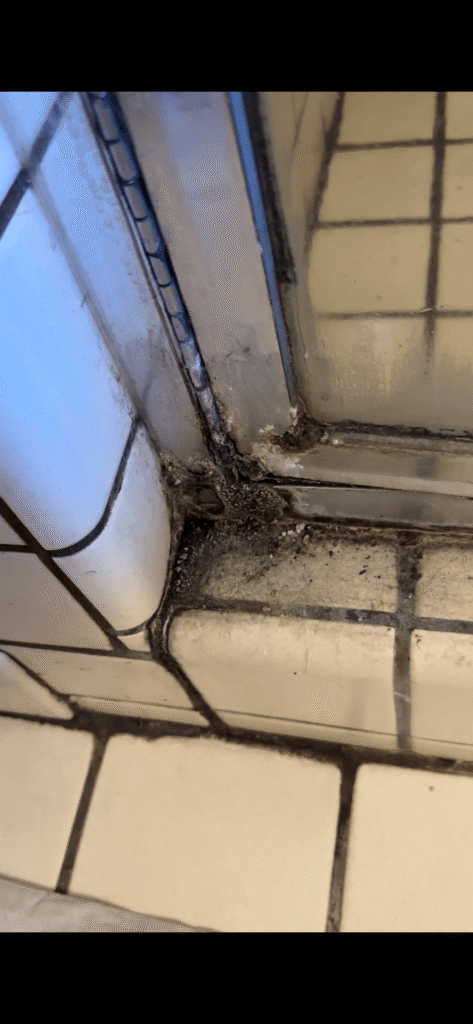
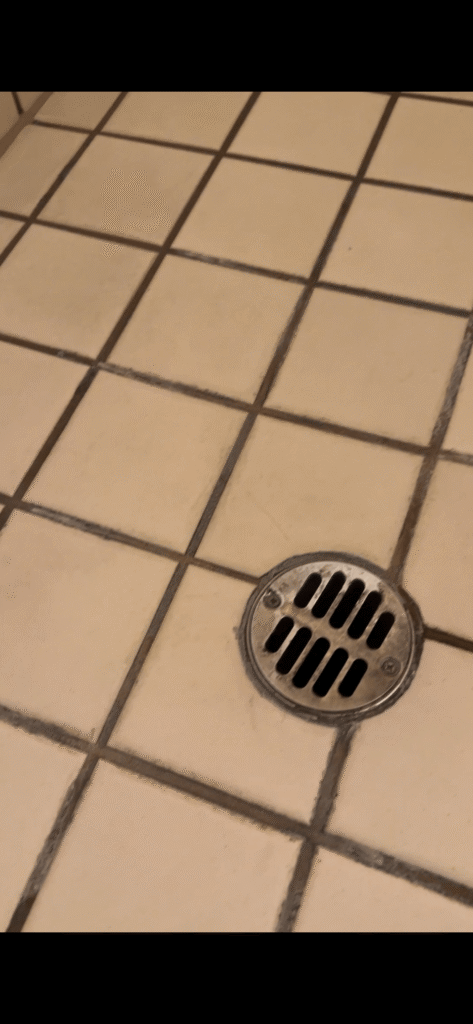
    Before Restoration Conditions


    Our 6-Step Shower Restoration Process in Action

    This project required nearly 8 hours of highly targeted technician labor to properly execute our signature protocol:

    1. Advanced Mold Remediation

    We applied a commercial-grade remediation product that kills mold spores within 60 seconds. Due to the deep contamination in the 3/16″ spread joints, this required multiple sequential applications to completely neutralize the subsurface growth.

    2. Mechanical Grout Preparation

    Surface washing isn’t enough. We utilized specialized stainless steel brushes to physically scrub and grind away the top layer of damaged, mold-stained cement grout. This exposed a completely fresh, stable layer of clean grout underneath without risking rust stains from inferior metal tools.

    3. Glass Enclosure Restructuring

    All old, mold-compromised silicone around the glass enclosure and tile transitions was mechanically removed. We thoroughly sanitized the tracks and prepped the channels for re-sealing.

    4. Drain & Weep Hole Clearing

    We strip out the drain cover and excavated accumulated debris exactly 2 inches below the shower floor level. Clearing these vital weep holes instantly restored the “water-in, water-out” functionality, ensuring the pan can drain completely and dry out between uses.

    5. High-Performance Grout Repair & Shower Restoration

    For all structural grout repairs, we don’t use standard cement base. We packed the joints with 100% epoxy grout. 100% epoxy is completely waterproof, chemically resistant, and structurally far superior to cement.

    6. 100% Silicone Perimeter Seal

    We seal all movement joints and glass transitions using premium 100% silicone. This provides a highly flexible, completely watertight seal that won’t shrink or break down like cheap acrylic caulks.

    Completed Restoration Results


    The Hard Truth About Grout Sealers & Mold

    There is a massive misconception among homeowners that grout sealers make grout waterproof or mold-proof. This is completely false.

    By design, grout needs to “breathe” to allow vapor and subsurface moisture to escape. Penetrating sealers are engineered specifically to allow this breathability process to happen, meaning it is physically impossible for a sealer to make cement grout waterproof.

    Furthermore, epoxy grout is not immune to mold—and the reality is, nothing is. If organic matter like soap scum and skin cells sits on a surface with moisture, mold will grow on it, whether it’s plastic, tile, cement, or epoxy.

    Cure Time & Return to Service: The shower was fully prepped, executed, and delivered in under 8 hours. The shower was cleared for full use exactly 24 hours later to allow the advanced 100% epoxy grout and 100% silicone to fully cure and achieve maximum strength.


    Pro Tips for Maintaining an Older Shower

    At the final walkthrough, we always leave our Sacramento area clients with a clear roadmap to keep their restored shower looking pristine without spending hours scrubbing:

    • The 5-Minute Maintenance Rule: The absolute key to protecting your professional shower restoration and stopping mold from returning is to maintain and clean your shower every two weeks. You don’t need heavy chemicals or intense scrubbing. All it takes is a purpose-made grout cleaner that is safe on grout, a small nylon grout brush, and 5 minutes of your time.
    • The Ultimate Key: Dry It Out: The single most effective thing you can do is get that shower to dry out completely before the next use. Just a reality—mold cannot survive without moisture. Tips like running an exhaust fan longer or utilizing a quick squeegee after the final shower of the day dramatically cuts down the humidity levels that spores need to activate.
    • Understand Stained Silicone: If you see black mold spots creeping behind or inside your silicone, surface sprays won’t fix it. The silicone is permanently damaged and requires professional replacement.

    For a deeper dive into the specific products we recommend, step-by-step instructions on how to use them, and how to check your tile for invisible soap scum to make sure you are cleaning thoroughly, check out our dedicated FAQ Section.