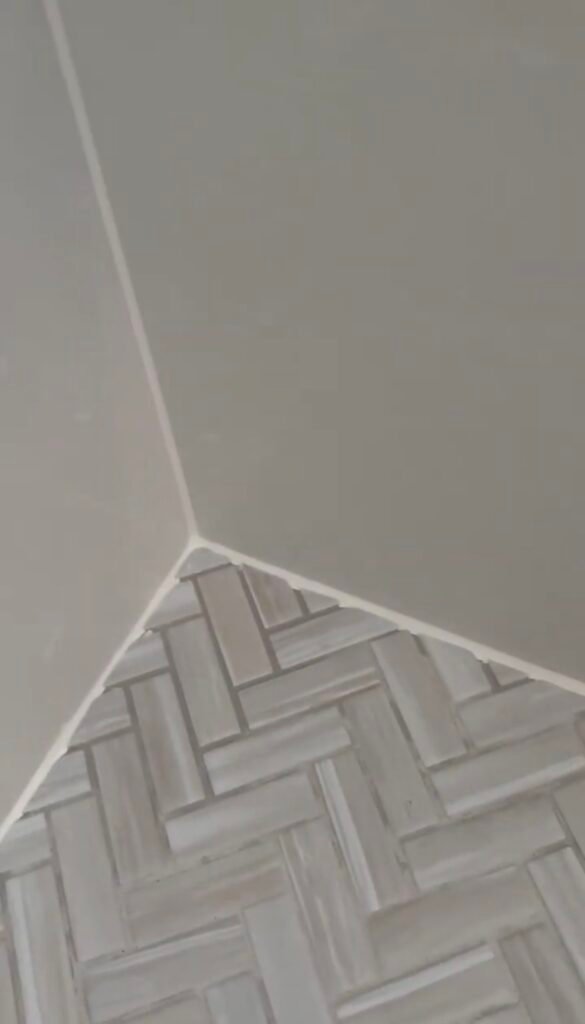
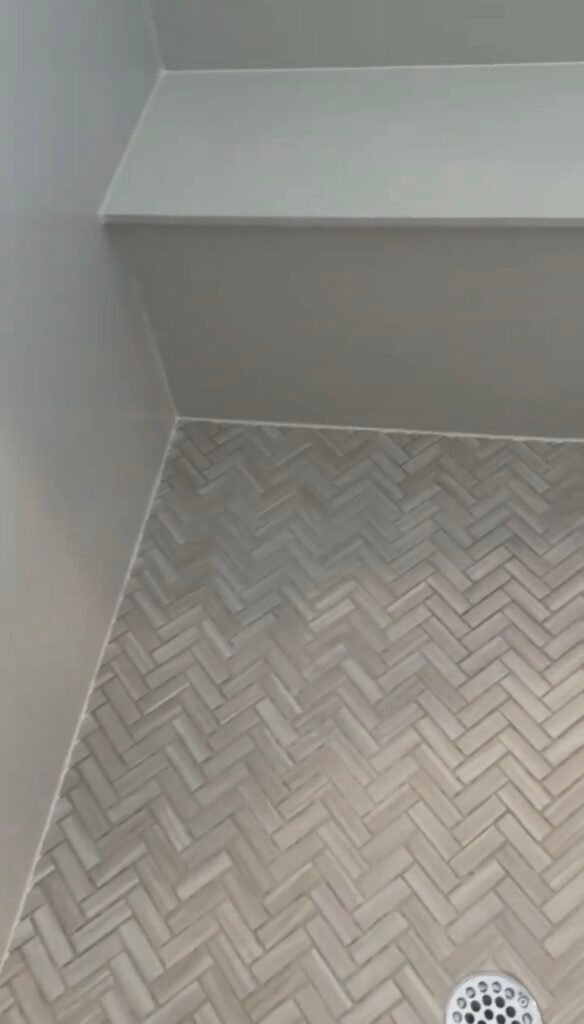
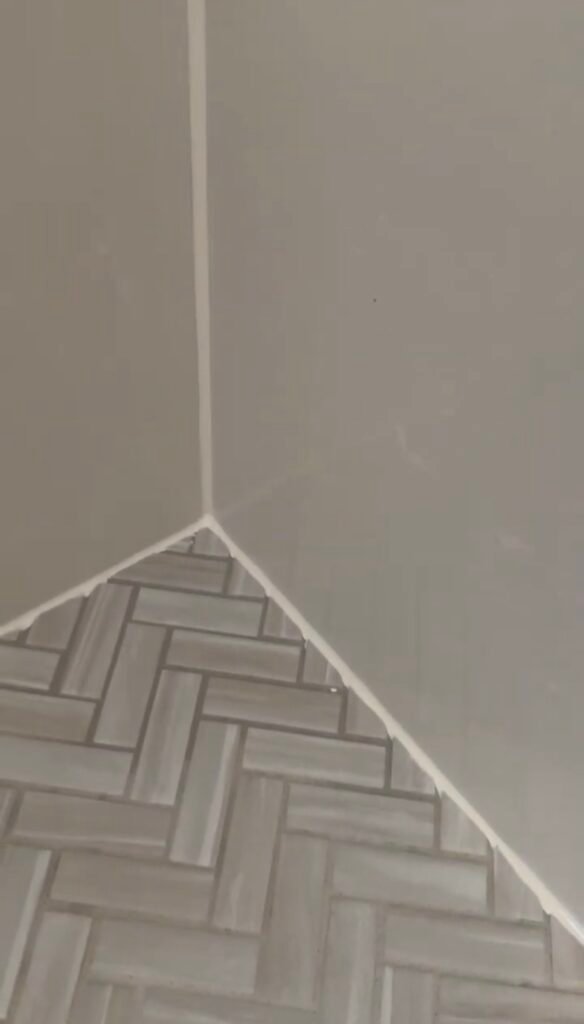
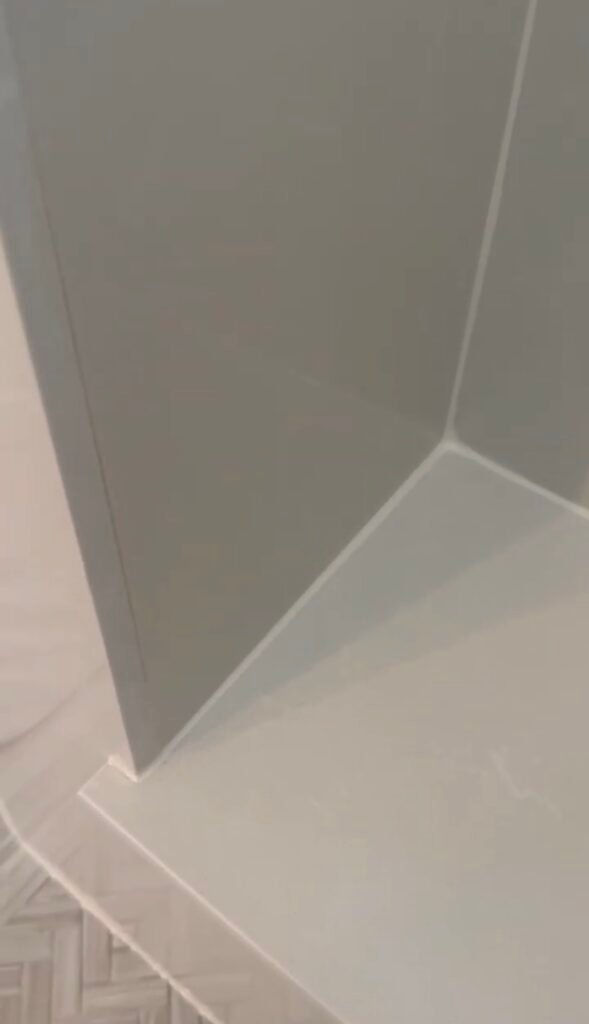
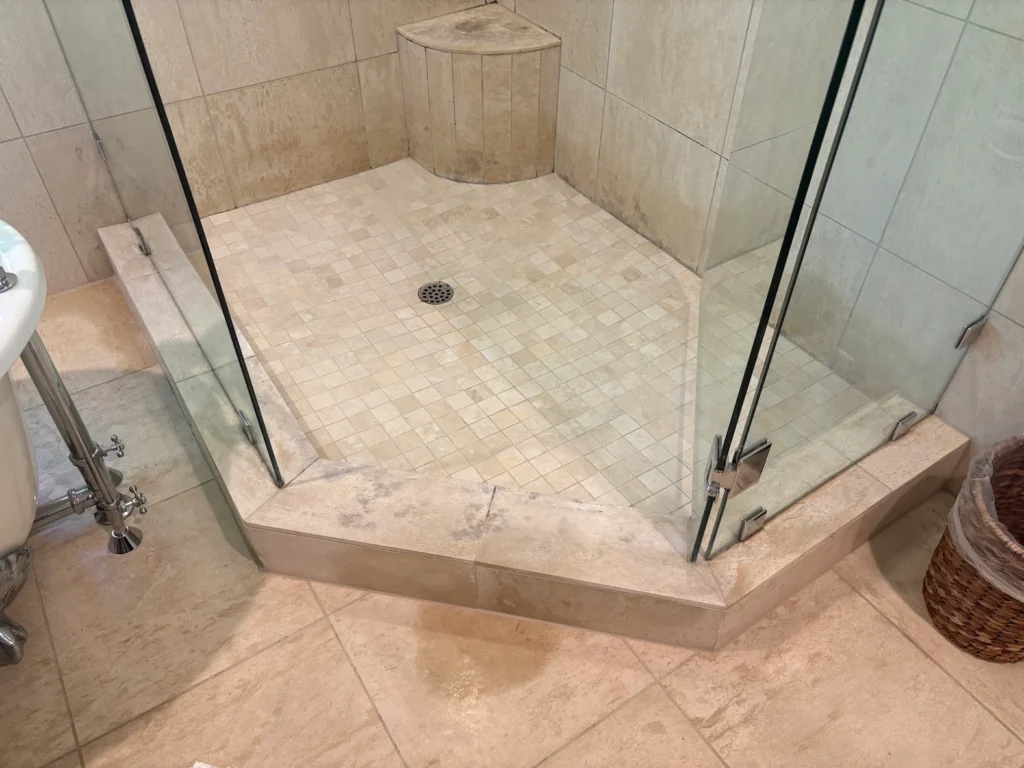
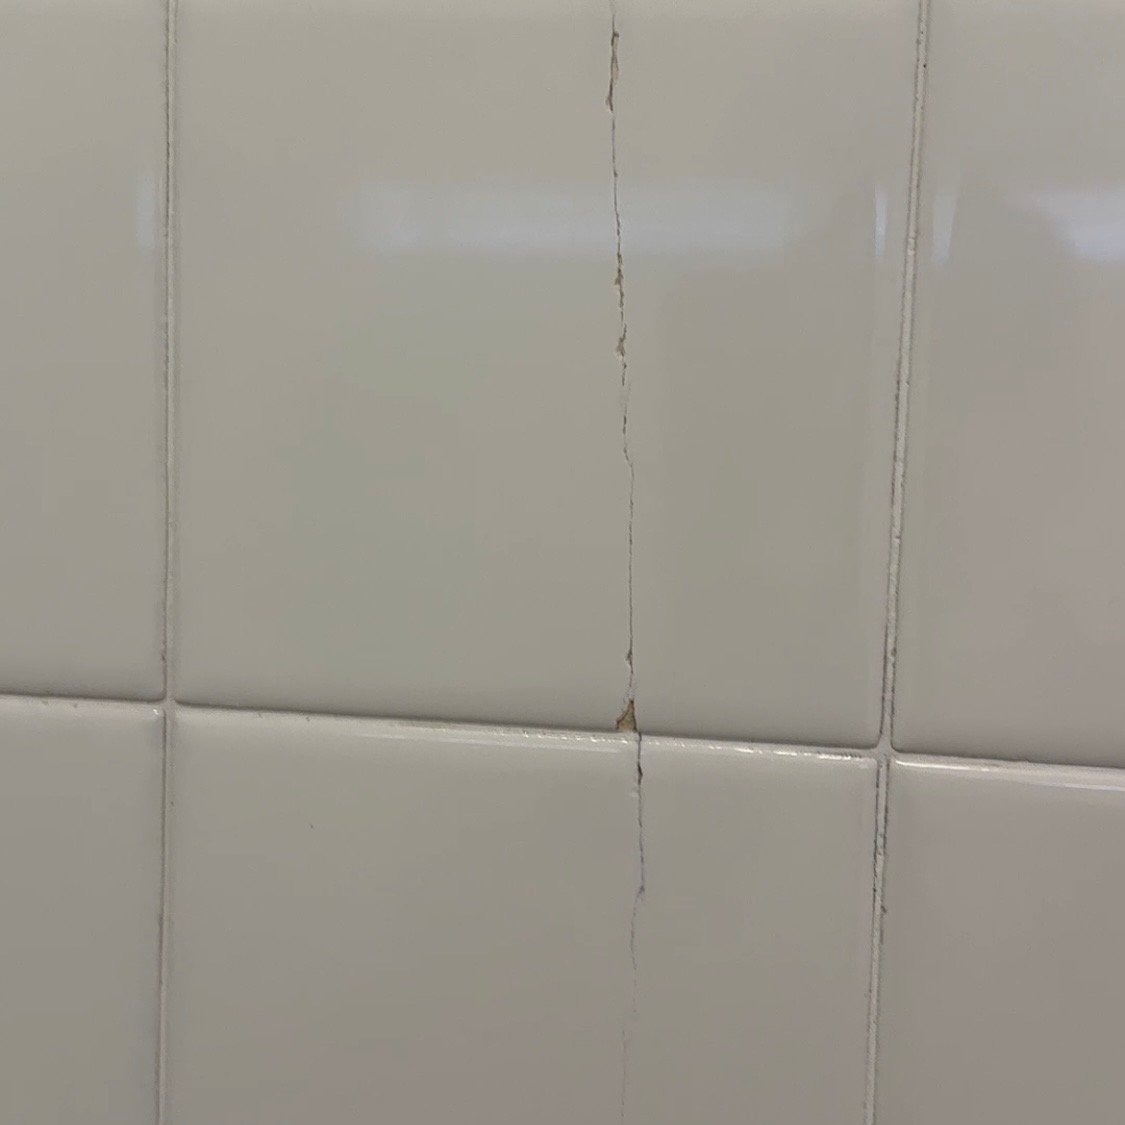
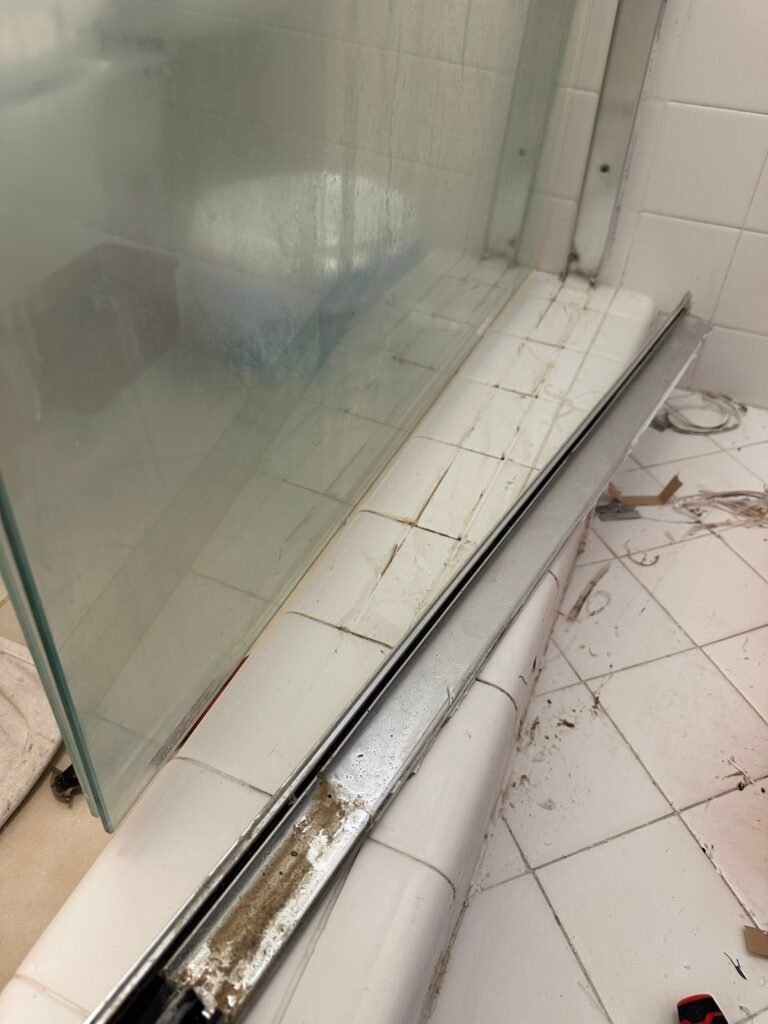
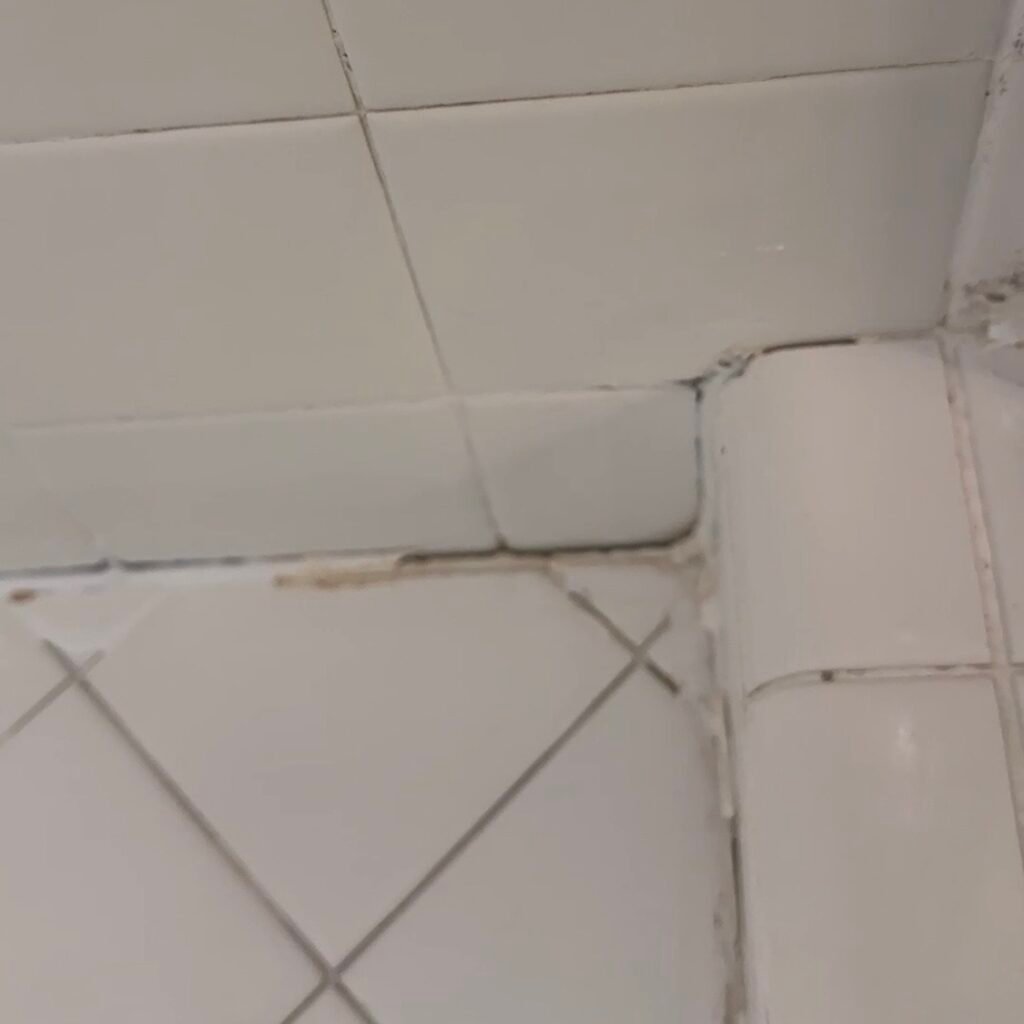
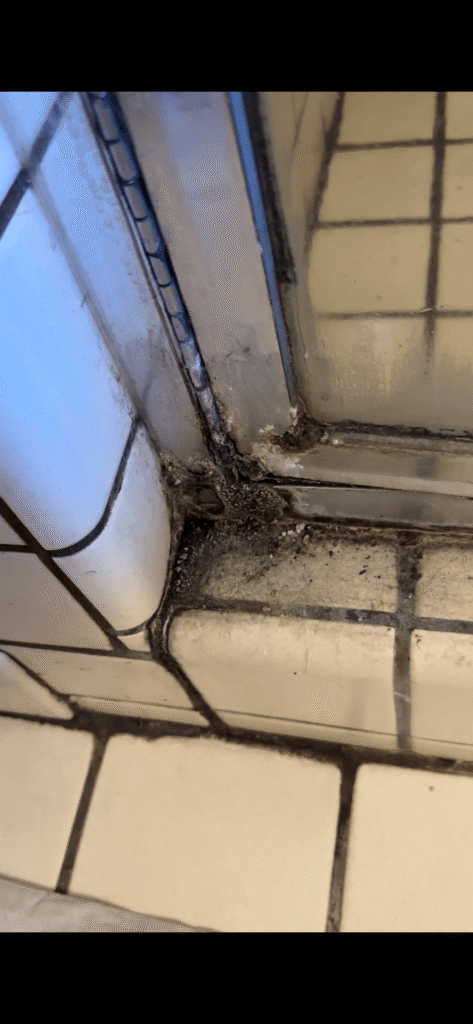
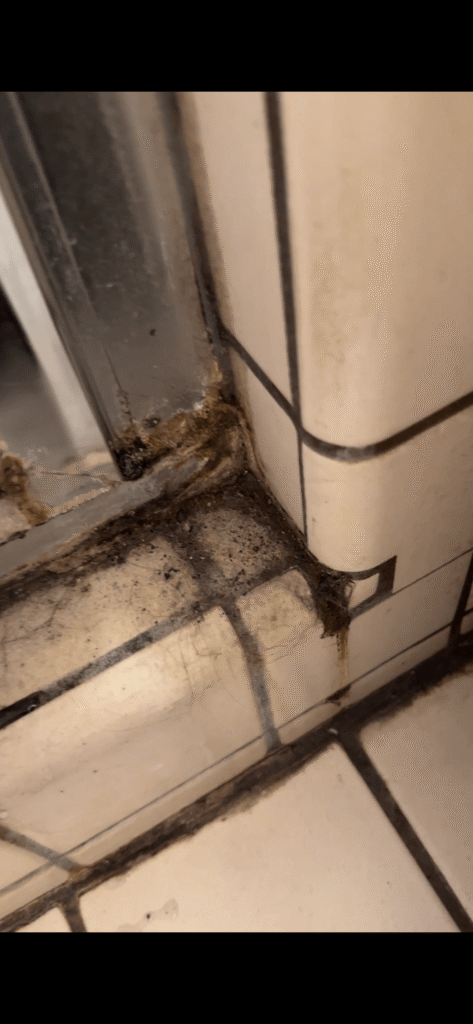
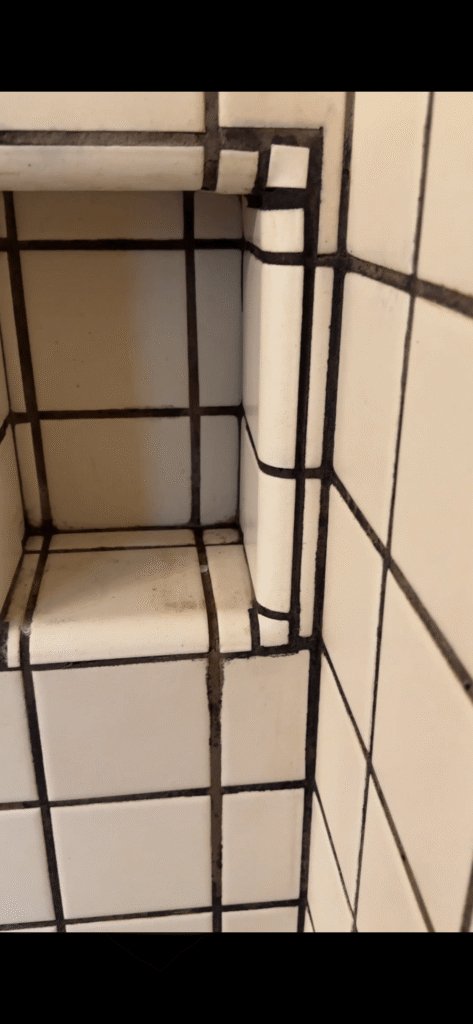
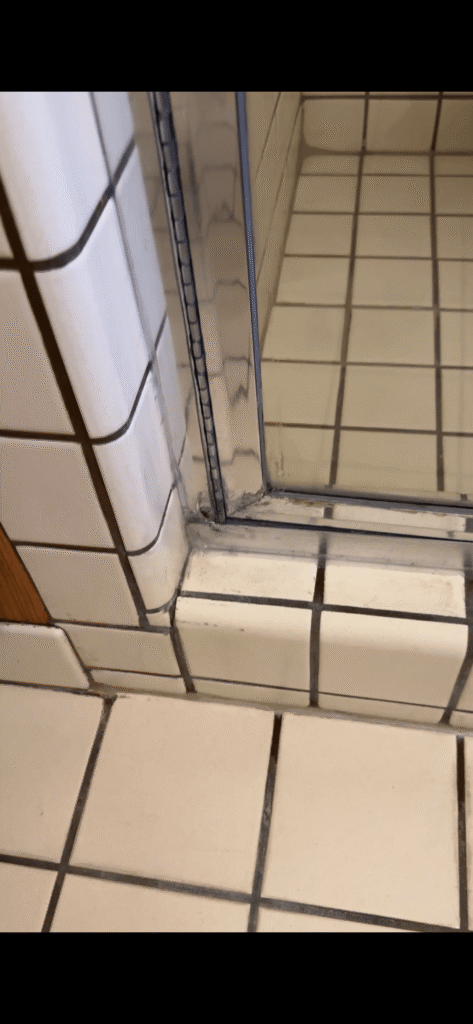
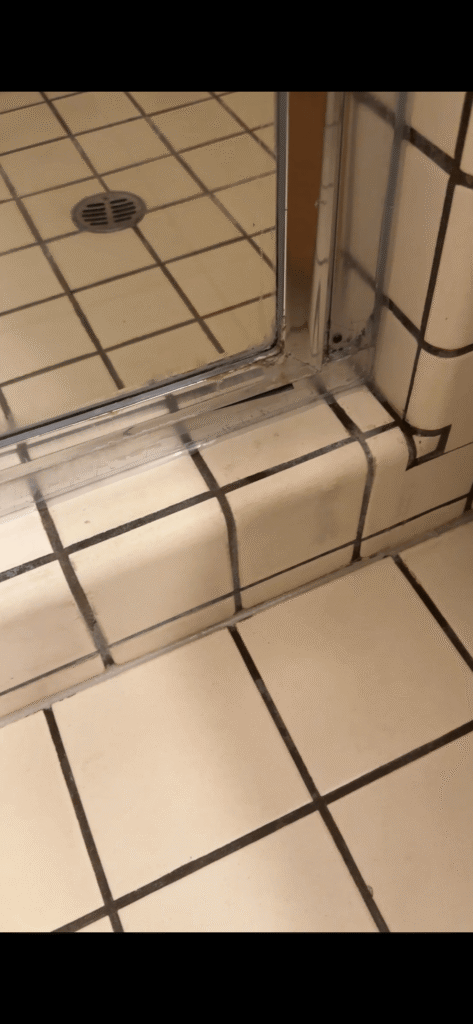
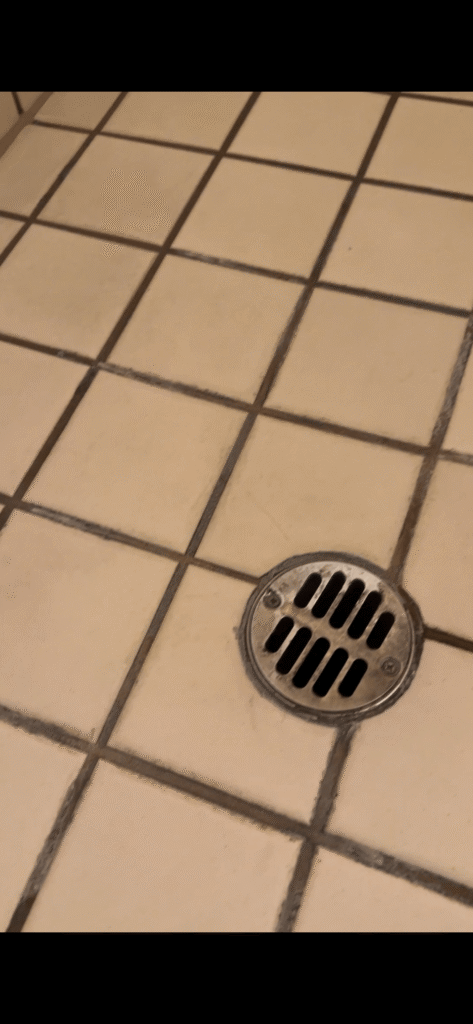
“Can I just get my shower cleaned, get the mold killed, and have the grout sealed so the mold stops coming back?”
The Reality: It is the single most common request I get on the phone. Homeowners assume a sealer is a magical shield that stops moisture, blocks grime, and keeps mold permanently at bay. After 30 years in the field and extensive personal testing, I can tell you the truth: sealers do not prevent mold, they do not stop water under pressure, and they are not a substitute for daily maintenance.
The Silicone and Mold Trap
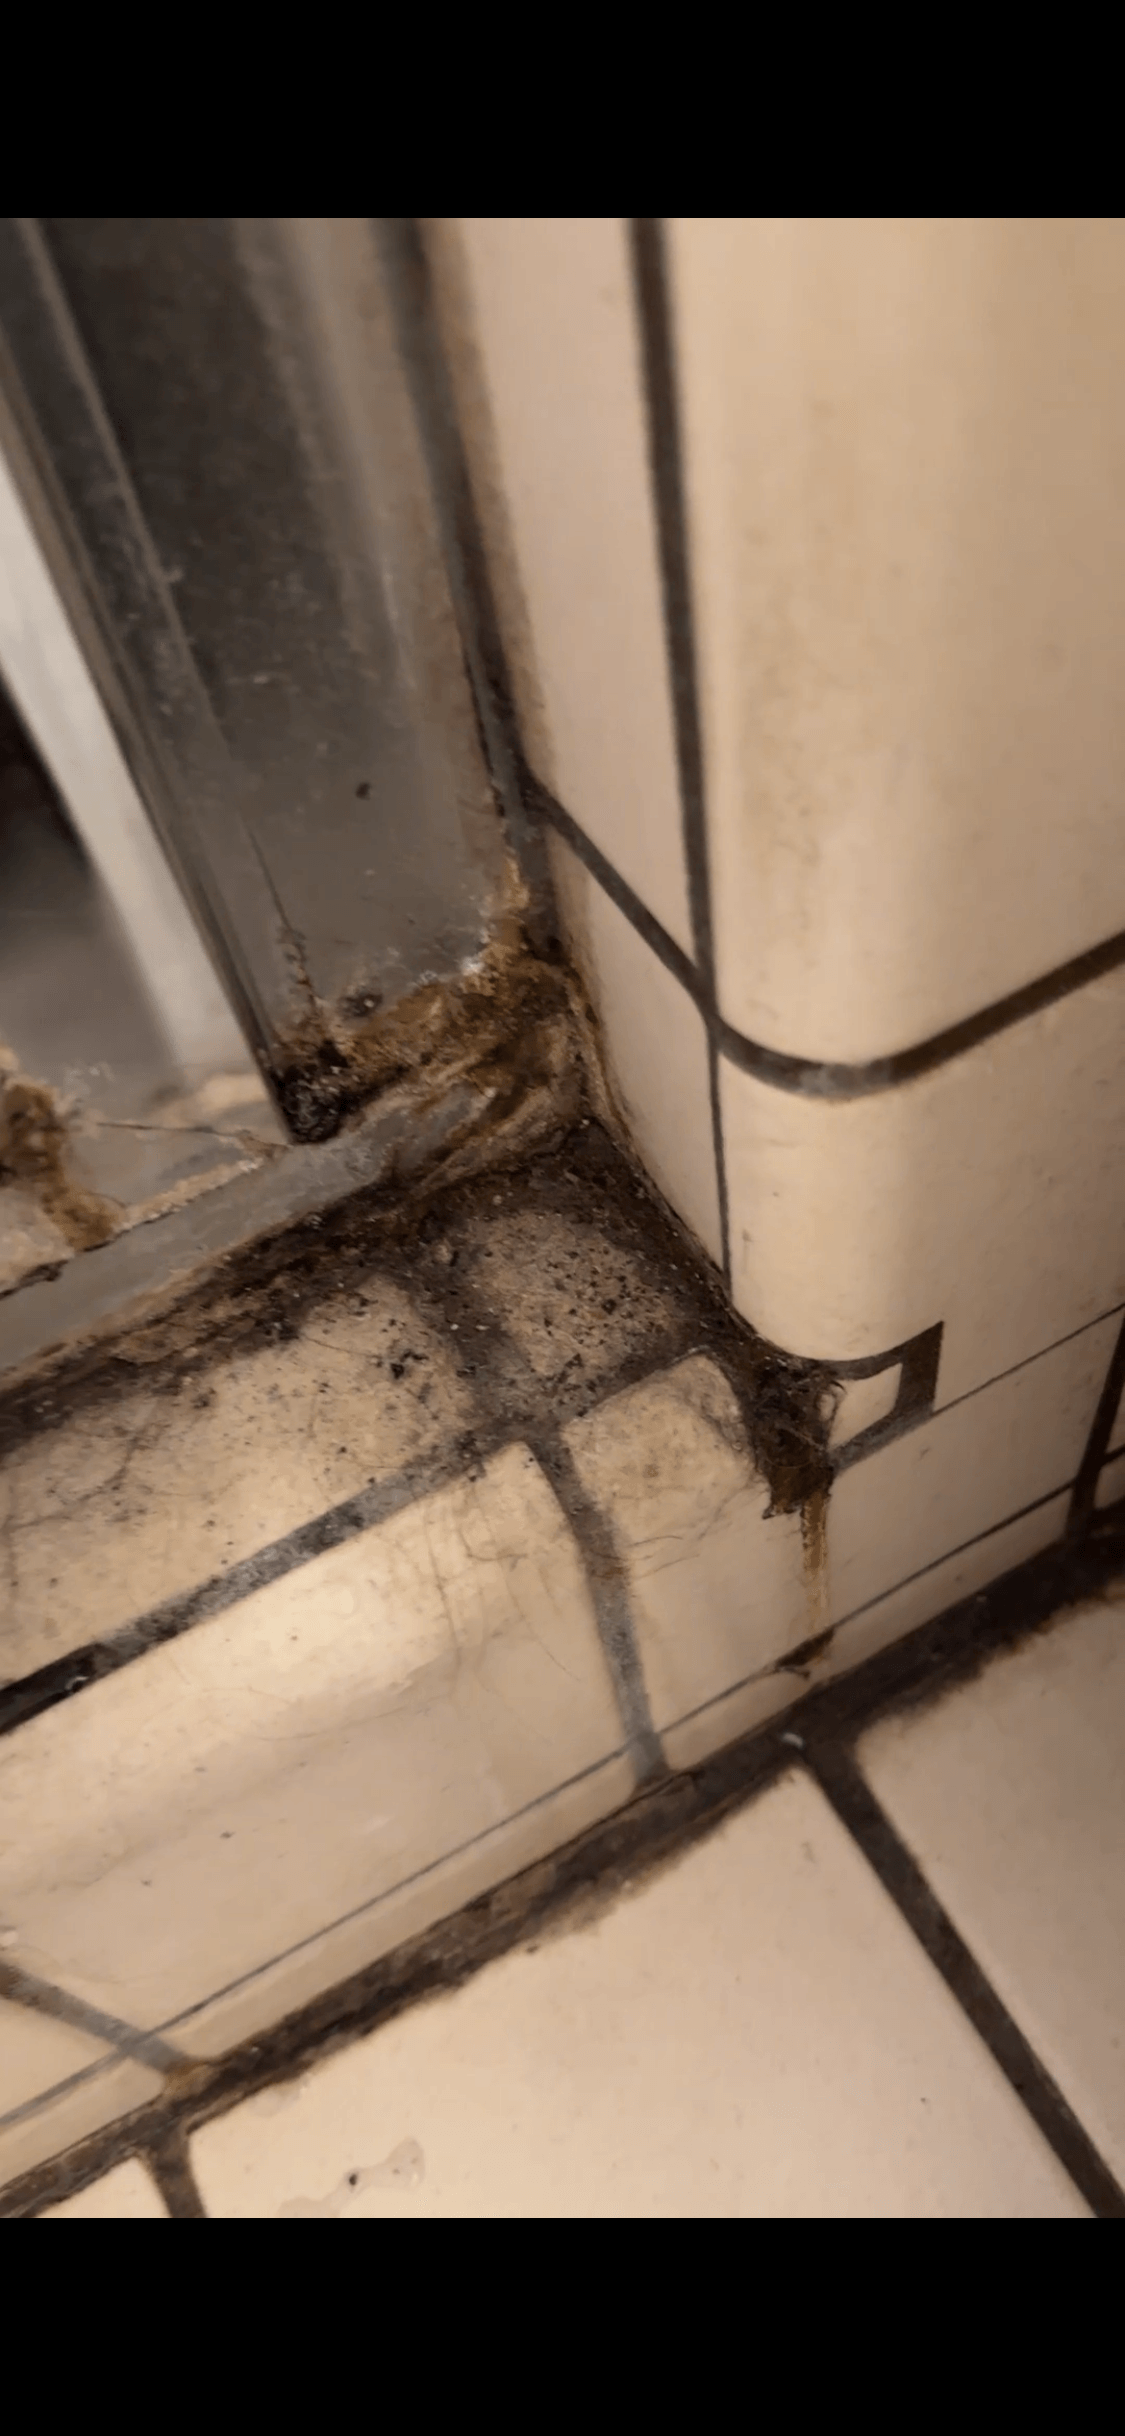
When clients call about recurring mold, they usually point to the dark, ugly lines in the corners or around the tub transition. They’ve tried bleach, mold killers, and heavy-duty sprays, but the black stain won’t budge.
Here is what most handymen and homeowners don’t realize: once mold spores take root inside flexible caulking, silicone, or degraded grout, the stain is permanent. Spraying a surface killer might kill the active organism, but it will never eat away the embedded black discoloration.
The only real fix is to completely knife and scrape it out, meticulously sanitize and dry the joint, and rebuild the perimeter. That is why my 6-step restoration process isn’t a quick wipe-down—it involves total structural extraction and the installation of 100% solid epoxy grout and 100% pure silicone where movement happens. A handyman might charge less to slap new silicone over old mold, but within months, it’s right back.
The Grout Sealer Conundrum: What They Do and Don’t Do
Many competing services push sealers as the ultimate cure-all because customers want to hear that word. But let’s look at the engineering reality:
What Grout Sealers Do Do:
Impregnating Penetration: High-grade penetrating sealers soak deep into the micro-pores of natural stone or cementitious grout, becoming virtually invisible.
Stain Slowdown: They buy you time. By filling those microscopic pathways, they slow down how fast body oils, shampoo, and liquid spills absorb into the material.
Easier Mineral Release: They can help prevent hard water and mineral deposits from aggressively bonding to the surface, making routine cleaning slightly easier.
What Grout Sealers Don’t Do:
They Do NOT Stop Mold: Sealers do not contain magical “mold inhibitors” that stop fungus from growing. Mold loves moisture, soap scum, and organic debris. If a shower stays wet, mold will grow right on top of a sealed joint.
They Do NOT Waterproof: Look at the back of any sealer bottle. You will never see the word “waterproof.” Water under gravity and hydrostatic pressure will easily pass right through sealed grout.
They Do NOT Keep Grout Clean Forever: Because tile grout is recessed by industry design, mops and cleaning pads glide right over the top of the tile, pushing dirt straight into the low grout joints. If you use a cleaner that leaves a sticky residue, your sealer will actually attract dirt faster.
The Danger of Topical Sealers: Avoid low-grade topical sealers (like gloss or colorants) that sit entirely on the surface. If they aren’t applied to a surgically clean surface—or if they get gouged by a cleaning tool—they will start peeling. Once a topical sealer peels, it’s game over; water gets trapped underneath, creating a breeding ground for subsurface decay.
The Physics of a Mold-Free Shower (It’s About the Drying Cycle)
Why do some areas get wrecked by mold while others stay clean? It comes down to gravity and drying time.
In almost every shower, the top half dries out quickly because warm air rises and moisture escapes. But the bottom third—especially the first 12 inches above the pan and the corners—stays wet for hours, or even days, if occupants step out, close the glass door, and never run a fan or grab a squeegee.
If a shower never gets a chance to dry out, mold will grow no matter what products you use. No sealer on earth can override the laws of physics and moisture.
How We Handle It in the Real World
When a client asks for sealing, I give them total transparency. Yes, I can apply a top-tier penetrating sealer to your natural stone or grout to protect against deep staining. But I make sure they understand the golden rule of bathroom longevity:
Fix the Foundation: Strip out failing materials, clear out old silicone, and rebuild structural transitions with epoxy and pure silicone.
Apply Protection Where It Counts: Use professional impregnating sealers to slow down absorption, especially on porous natural stones like travertine or marble.
Manage Expectations on Stone Damage: If hard water (especially aggressive local water like we see in Gold River and parts of Sacramento) has been left to form lime scale, it literally eats away the calcium inside natural stone (like travertine or marble). Surface cleaning won’t fix etched, eroded stone; it requires mechanical diamond polishing or a hybrid restoration pass.
Commit to the Maintenance Guide: A great shower restoration gives you a reset, but keeping it pristine requires following a proper maintenance protocol—using the right pH-neutral products, avoiding harsh acids that strip stone, and actually giving the enclosure a chance to dry out.
Sealers aren’t completely worthless, but they are a protective maintenance tool, not a miracle cure. When combined with a true structural restoration and disciplined habits, your shower can stay healthy for years.
Is your shower suffering from recurring mold, failing sealers, or hard water damage? Contact Grout Repair Pro today to schedule a professional evaluation.
A homeowner in Elk Grove contacted Grout Repair Pro because their 26-year-old tub/shower had developed moldy silicone caulk, heavy hard water buildup on the glass, stained grout, and years of surface wear. They wanted to restore the existing shower rather than replace the tile if the underlying installation was still in good condition.
Issues Addressed: Moldy silicone caulk, localized grout deterioration, hard water mineral deposits, and tub surface staining
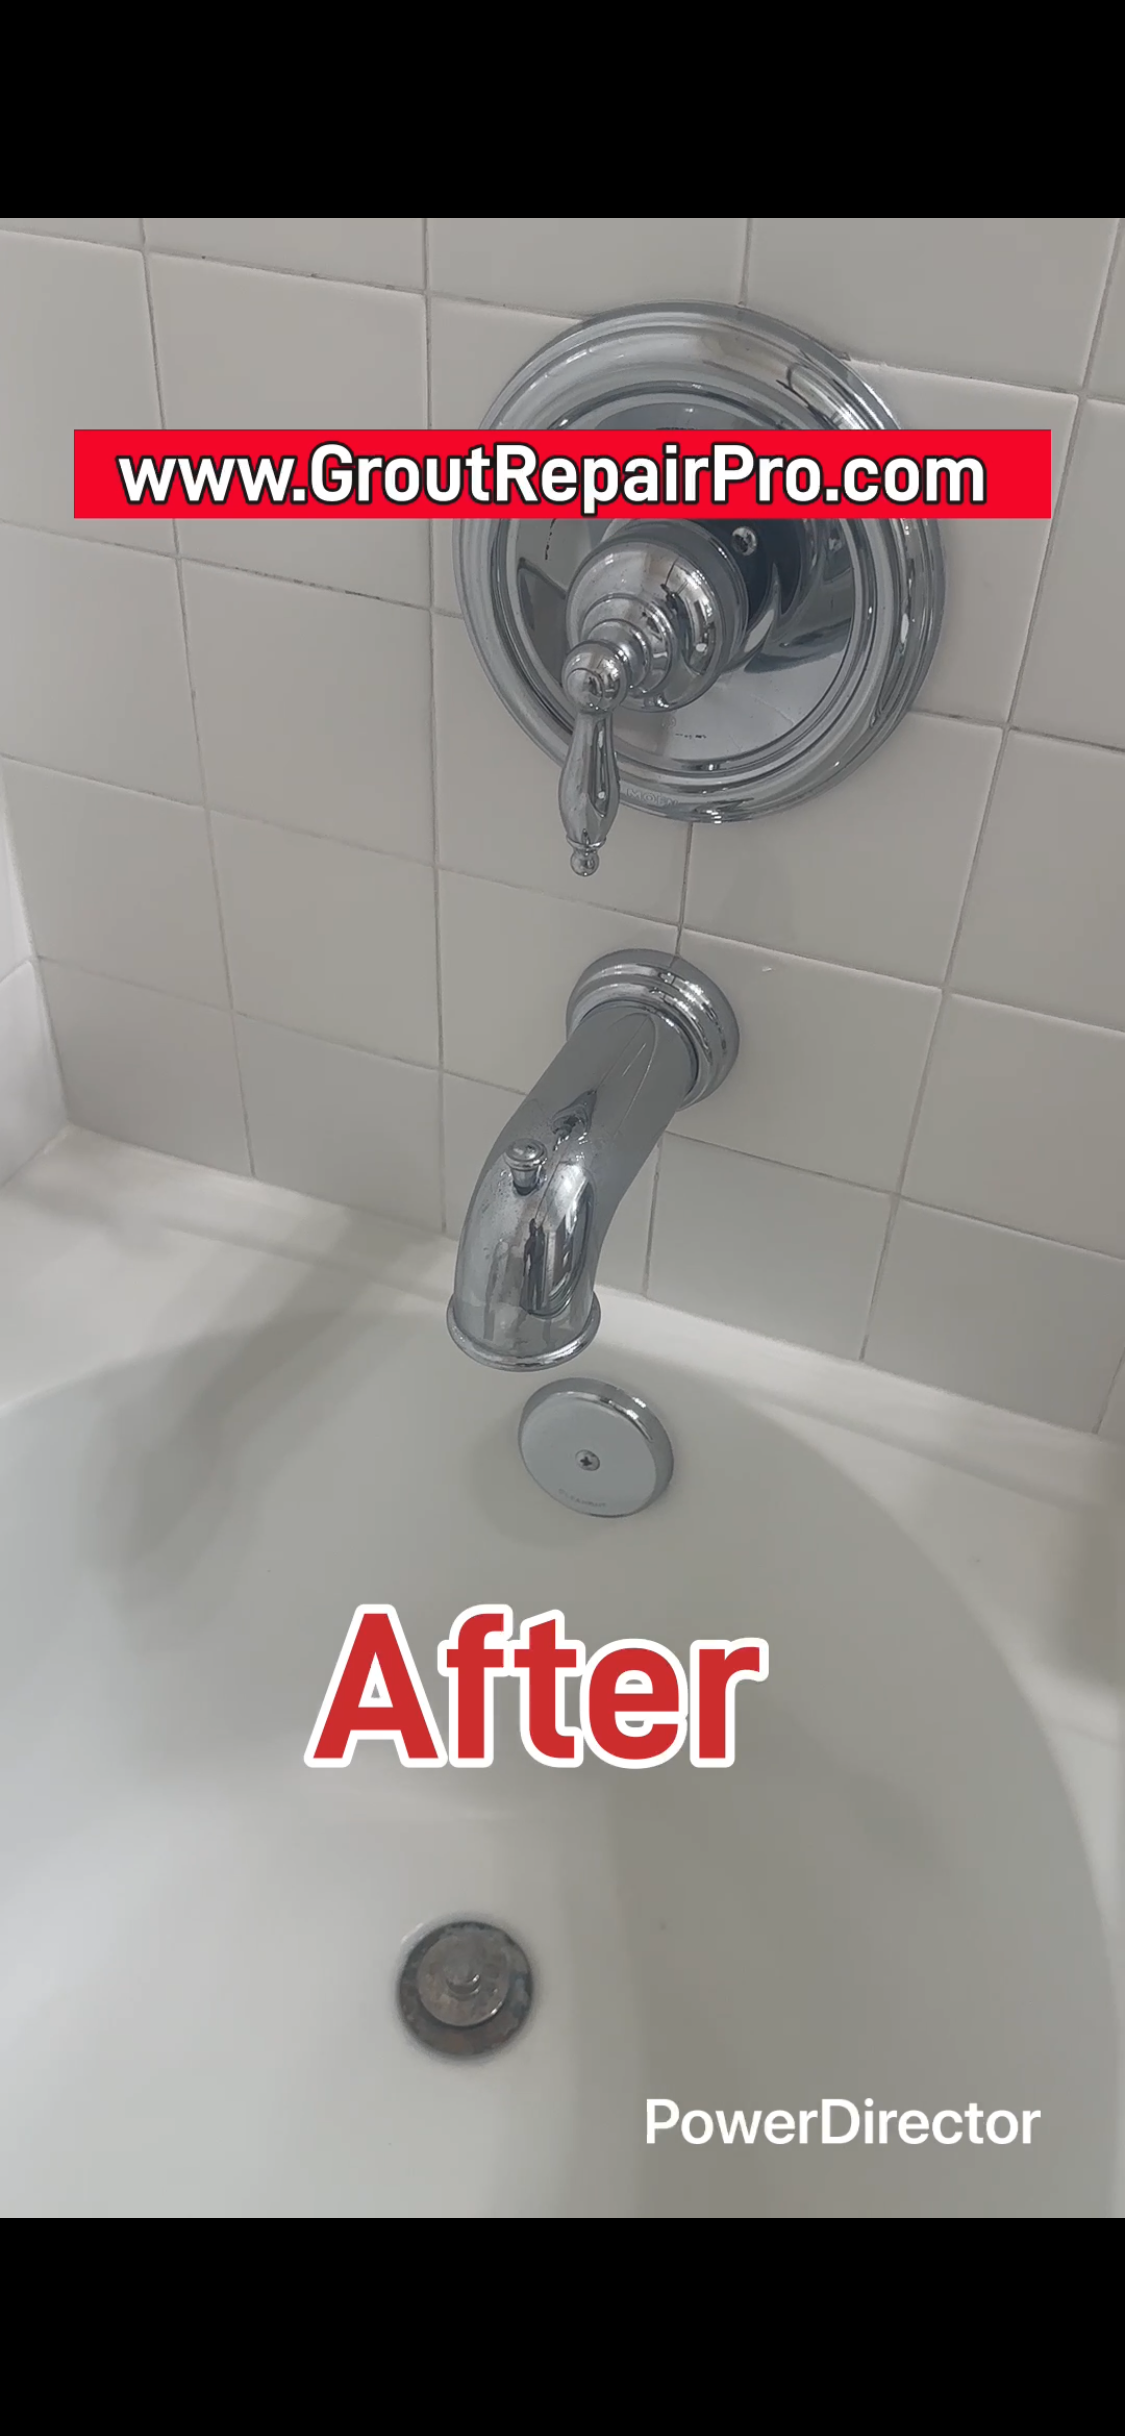
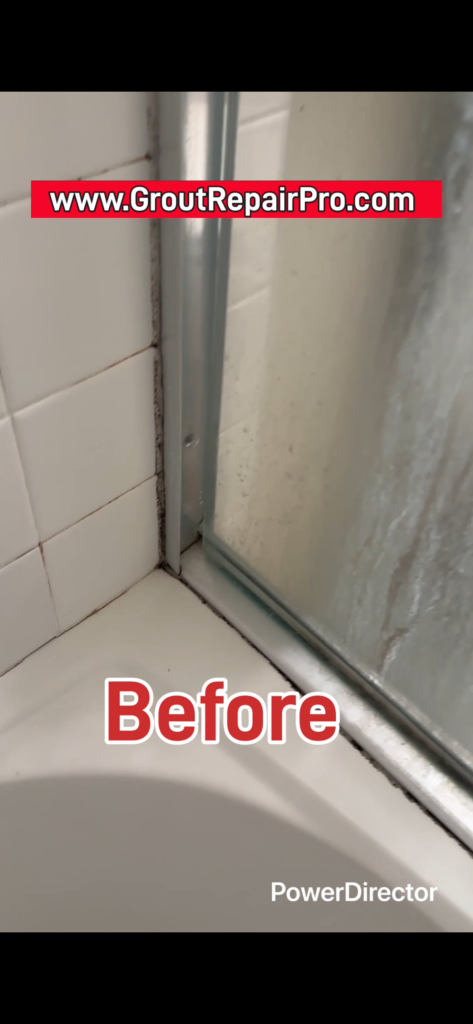
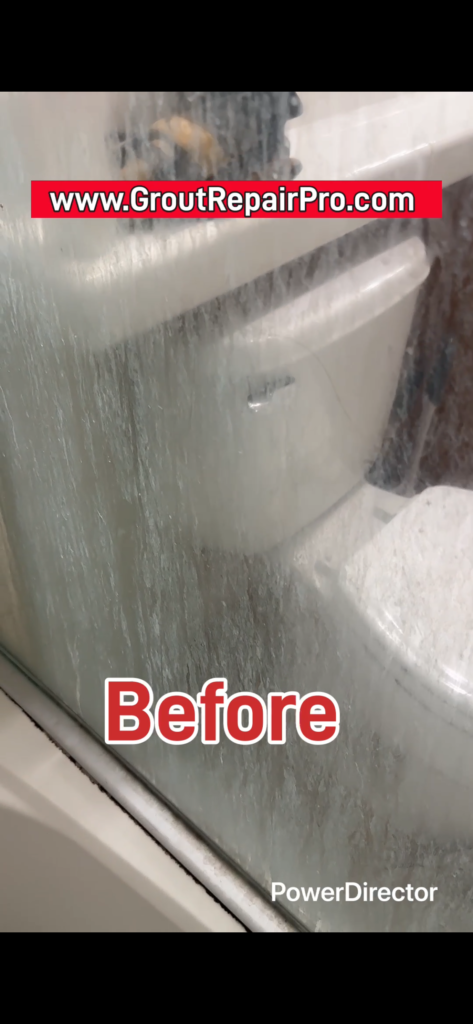
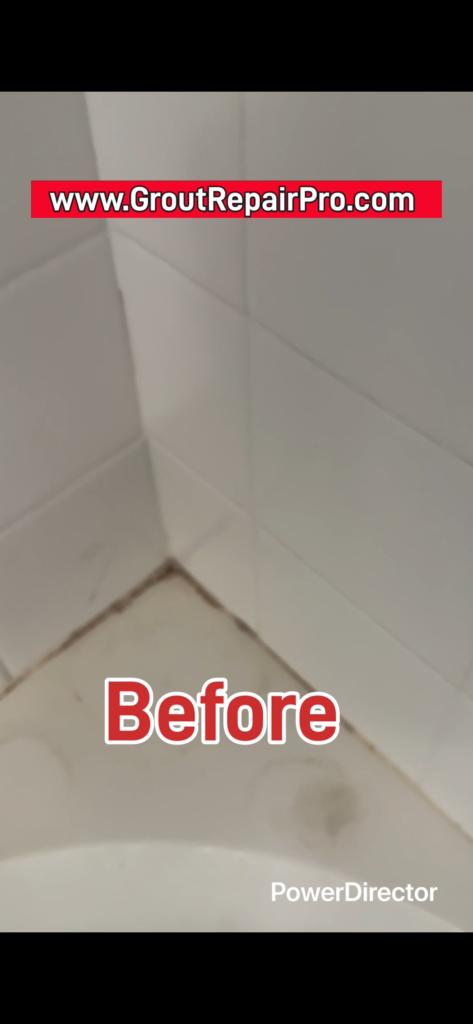
Before restoration: failed silicone caulk with visible mold growth at the tub-to-tile transition.Before: Significant hard water mineral deposits and soap scum on the lower shower glass.Before: Persistent product staining on the tub ledge and grout wear near the soap dish.
During the evaluation, I found that the shower was a good candidate for restoration. The tile installation was still functional, but several areas showed signs of aging and required targeted repairs.
Issues Identified During the Initial Evaluation
This 26-year-old tub/shower had several issues that developed over decades of daily use. While mold growth, grout wear, and mineral buildup are common in older showers, this installation had several specific areas that required attention.
Mold Growth at the Tub-to-Tile Transition
The primary concern was mold accumulation along the lower tub-to-tile joint. The original silicone caulk had aged and was no longer providing a clean, maintainable surface in an area exposed to frequent moisture.
Calcium Deposits on Shower Glass
The glass enclosure had significant mineral buildup from years of hard water exposure. The lower sections of the glass showed the heaviest deposits where water remained after shower use.
Long-Term Product Staining on the Tub Surface
One unique issue with this shower was the staining left behind from years of shampoo and personal care products sitting on the tub ledge. Over time, repeated exposure to these products created stubborn discoloration that could not be removed through normal cleaning.
Localized Grout Wear Around the Soap Dish
The grout damage was not throughout the entire shower. The most noticeable deterioration was around the soap dish and corner areas where moisture exposure and movement commonly affect grout joints.
How We Restored This Shower
Restoring this tub/shower required a combination of deep cleaning, surface restoration, targeted repairs, and new sealant work. Because the shower structure was still sound, the goal was to restore the existing installation rather than replace the tile.
Glass Restoration and Mineral Deposit Removal
Because mineral deposits can bond tightly to glass surfaces over time, this process required more than standard household cleaning methods.
Shower Door Track Cleaning and Mold Removal
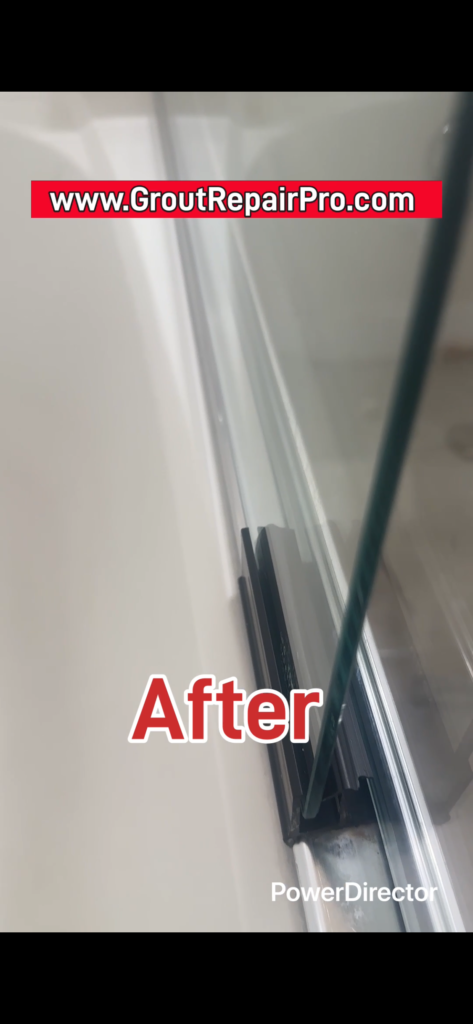
The bottom door tracks were removed to access areas that are normally difficult to clean. This allowed us to remove trapped moisture, buildup, and mold from beneath the tracks before restoring and resealing the area.
Grout Repair and Tile Restoration
The deteriorated grout areas around the soap dish and corners were repaired. An epoxy grout was used in the soap dish area to provide a durable, stain-resistant repair in a high-use location.
Silicone Caulk Replacement
The failed silicone at the tub-to-tile transition was removed and replaced with new 100% silicone to create a clean, finished joint.
The Results
After restoration, the tub/shower was transformed from a difficult-to-maintain 26-year-old enclosure into a clean, refreshed, and functional space. The failed silicone was replaced, mineral buildup was removed from the glass, damaged grout areas were repaired, and the shower was restored without the cost and disruption of tile replacement.
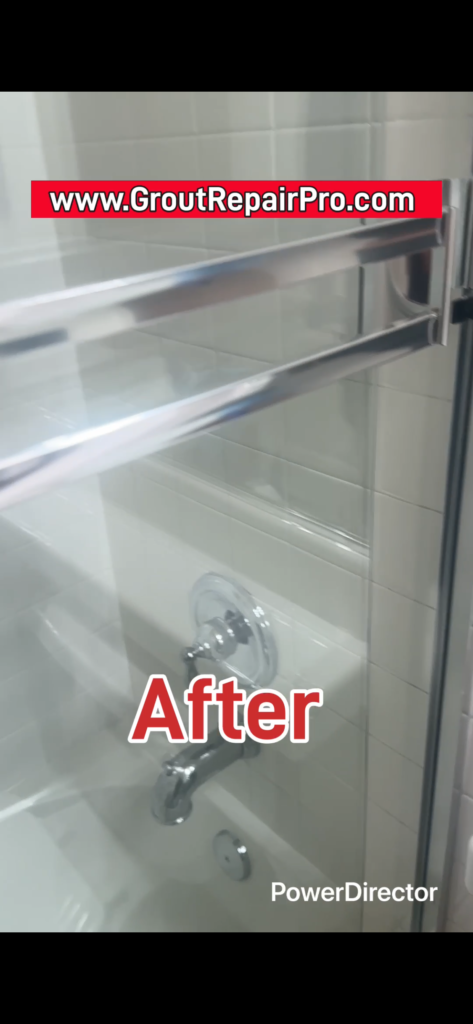
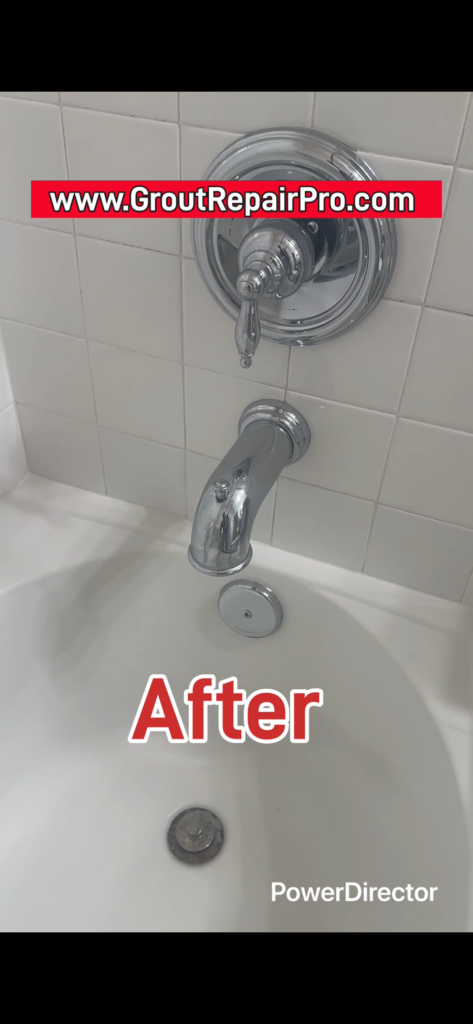
After: A clean, refreshed, and watertight shower restored without the cost of a full remodel.After: Crystal clear shower glass following our deep cleaning and restoration process.Tub and tile joint area repaired with durable, stain-resistant epoxy grout.
The homeowner was pleased with the improvement and was provided with the Grout Repair Pro Maintenance Guide to help care for the restored shower and reduce future mold and mineral buildup.
Shower Maintenance Recommendations
To help extend the life of this restoration, the homeowner was provided recommendations for drying the shower, maintaining silicone joints, and reducing mineral buildup on the glass.
Frequently Asked Questions
Can an old tile shower be restored instead of replaced?
Many older showers do not need complete replacement. If the tile installation is still structurally sound, restoration can often address failing caulk, grout deterioration, staining, and surface buildup while preserving the existing tile.
Can moldy shower caulk be cleaned or does it need to be replaced?
In many cases, once silicone caulk has developed deep mold discoloration, cleaning products will only provide a temporary improvement. If mold has penetrated the silicone or the caulk has separated from the surface, replacement is usually the better long-term solution.
Can hard water stains be removed from shower glass?
Heavy calcium deposits often cannot be removed with normal household cleaners. The method required depends on the severity of the buildup and the condition of the glass.
Grout Repair Pro provides shower restoration, grout repair, and silicone replacement services throughout Elk Grove and the surrounding Greater Sacramento Valley area.
Need Help With Your Shower?
If your shower has similar problems with grout, caulk, hard water buildup, or staining, contact Grout Repair Pro to schedule an evaluation at 916.600.2009
A homeowner in Elk Grove contacted Grout Repair Pro because their 26-year-old tub/shower had developed moldy silicone caulk, heavy hard water buildup on the glass, stained grout, and years of surface wear. They wanted to restore the existing shower rather than replace the tile if the underlying installation was still in good condition.
Issues Addressed: Moldy silicone caulk, localized grout deterioration, hard water mineral deposits, and tub surface staining
Before restoration: failed silicone caulk with visible mold growth at the tub-to-tile transition.Before: Significant hard water mineral deposits and soap scum on the lower shower glass.Before: Persistent product staining on the tub ledge and grout wear near the soap dish.
During the evaluation, I found that the shower was a good candidate for restoration. The tile installation was still functional, but several areas showed signs of aging and required targeted repairs.
Issues Identified During the Initial Evaluation
This 26-year-old tub/shower had several issues that developed over decades of daily use. While mold growth, grout wear, and mineral buildup are common in older showers, this installation had several specific areas that required attention.
Mold Growth at the Tub-to-Tile Transition
The primary concern was mold accumulation along the lower tub-to-tile joint. The original silicone caulk had aged and was no longer providing a clean, maintainable surface in an area exposed to frequent moisture.
Calcium Deposits on Shower Glass
The glass enclosure had significant mineral buildup from years of hard water exposure. The lower sections of the glass showed the heaviest deposits where water remained after shower use.
Long-Term Product Staining on the Tub Surface
One unique issue with this shower was the staining left behind from years of shampoo and personal care products sitting on the tub ledge. Over time, repeated exposure to these products created stubborn discoloration that could not be removed through normal cleaning.
Localized Grout Wear Around the Soap Dish
The grout damage was not throughout the entire shower. The most noticeable deterioration was around the soap dish and corner areas where moisture exposure and movement commonly affect grout joints.
How We Restored This Shower
Restoring this tub/shower required a combination of deep cleaning, surface restoration, targeted repairs, and new sealant work. Because the shower structure was still sound, the goal was to restore the existing installation rather than replace the tile.
Glass Restoration and Mineral Deposit Removal
Because mineral deposits can bond tightly to glass surfaces over time, this process required more than standard household cleaning methods.
Shower Door Track Cleaning and Mold Removal
The bottom door tracks were removed to access areas that are normally difficult to clean. This allowed us to remove trapped moisture, buildup, and mold from beneath the tracks before restoring and resealing the area.
Grout Repair and Tile Restoration
The deteriorated grout areas around the soap dish and corners were repaired. An epoxy grout was used in the soap dish area to provide a durable, stain-resistant repair in a high-use location.
Silicone Caulk Replacement
The failed silicone at the tub-to-tile transition was removed and replaced with new 100% silicone to create a clean, finished joint.
The Results
After restoration, the tub/shower was transformed from a difficult-to-maintain 26-year-old enclosure into a clean, refreshed, and functional space. The failed silicone was replaced, mineral buildup was removed from the glass, damaged grout areas were repaired, and the shower was restored without the cost and disruption of tile replacement.
After: A clean, refreshed, and watertight shower restored without the cost of a full remodel.After: Crystal clear shower glass following our deep cleaning and restoration process.Tub and tile joint area repaired with durable, stain-resistant epoxy grout.
The homeowner was pleased with the improvement and was provided with the Grout Repair Pro Maintenance Guide to help care for the restored shower and reduce future mold and mineral buildup.
Shower Maintenance Recommendations
To help extend the life of this restoration, the homeowner was provided recommendations for drying the shower, maintaining silicone joints, and reducing mineral buildup on the glass.
Frequently Asked Questions
Can an old tile shower be restored instead of replaced?
Many older showers do not need complete replacement. If the tile installation is still structurally sound, restoration can often address failing caulk, grout deterioration, staining, and surface buildup while preserving the existing tile.
Can moldy shower caulk be cleaned or does it need to be replaced?
In many cases, once silicone caulk has developed deep mold discoloration, cleaning products will only provide a temporary improvement. If mold has penetrated the silicone or the caulk has separated from the surface, replacement is usually the better long-term solution.
Can hard water stains be removed from shower glass?
Heavy calcium deposits often cannot be removed with normal household cleaners. The method required depends on the severity of the buildup and the condition of the glass.
Grout Repair Pro provides shower restoration, grout repair, and silicone replacement services throughout Elk Grove and the surrounding Greater Sacramento Valley area.
Need Help With Your Shower?
If your shower has similar problems with grout, caulk, hard water buildup, or staining, contact Grout Repair Pro to schedule an evaluation at 916.600.2009
Case Study: Diagnostic Discovery and Grout Integrity
Part 1: The Initial Assessment
This project began as a standard request to address missing and damaged grout at the critical junction where the shower floor meets the walls. I receive many calls for this specific issue, as it is a common failure point in residential showers. After the client submitted photos for my review, we discussed the shower’s dimensions and the specific areas of concern. Based on that information, I recommended my signature 6-step restoration process, which the client agreed to move forward with.
Part 2: On-Site Discovery
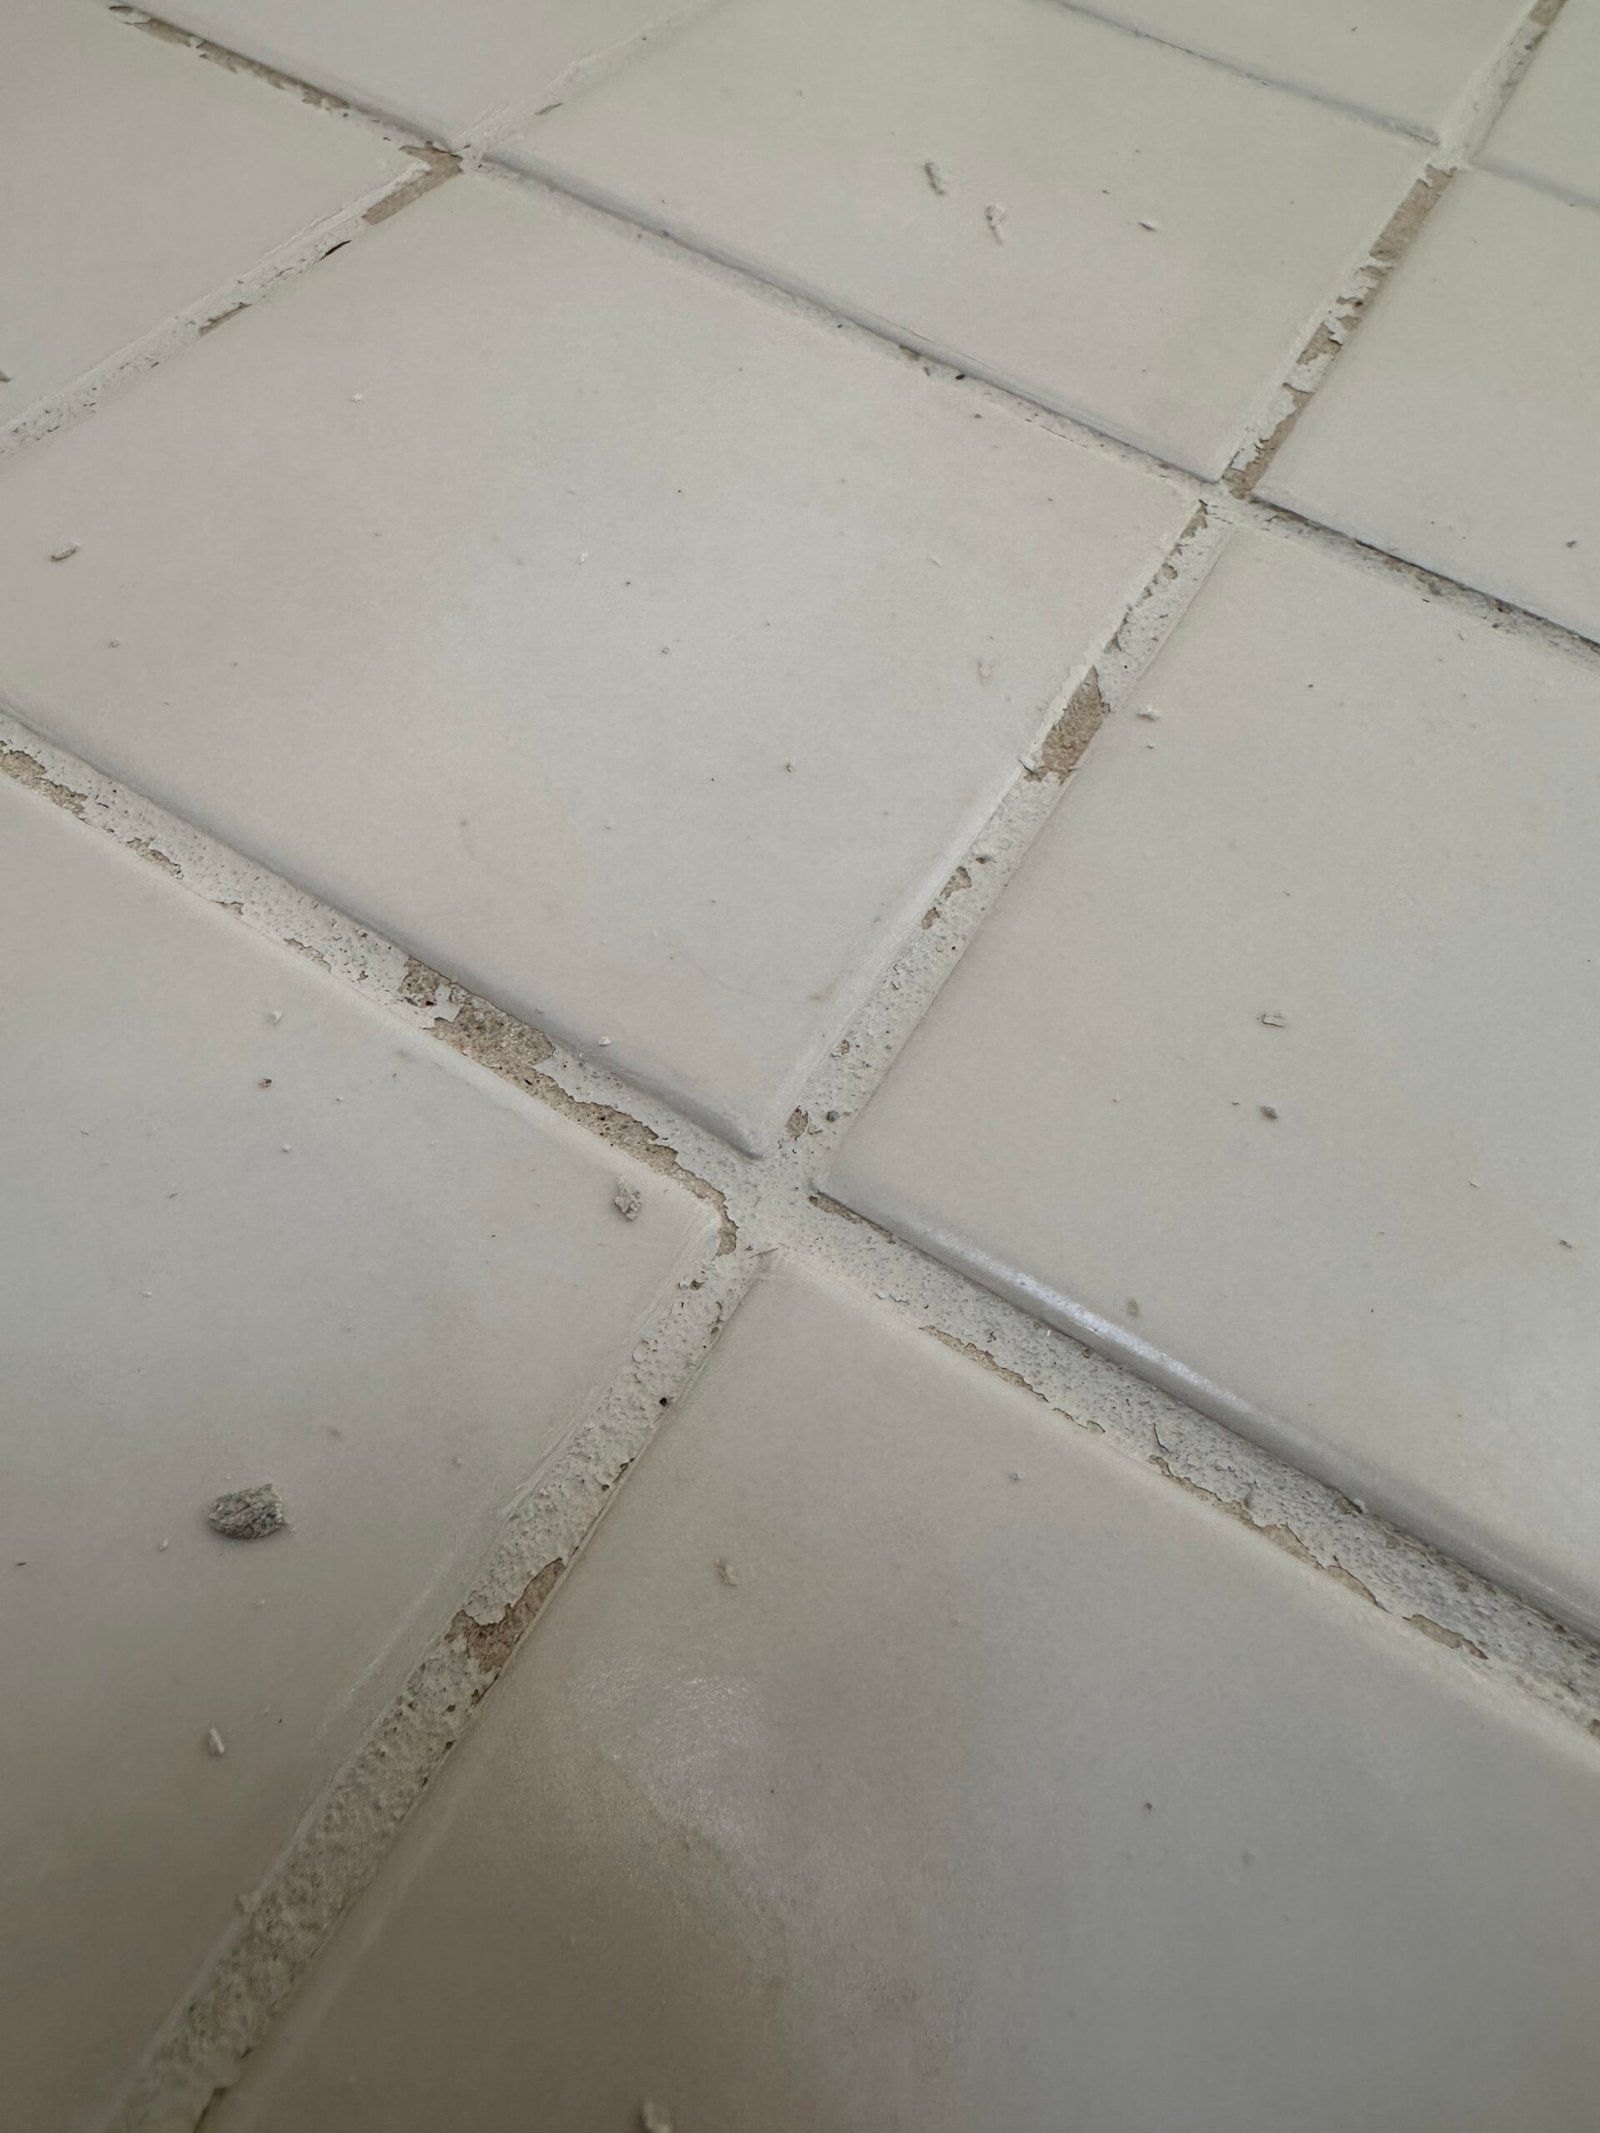
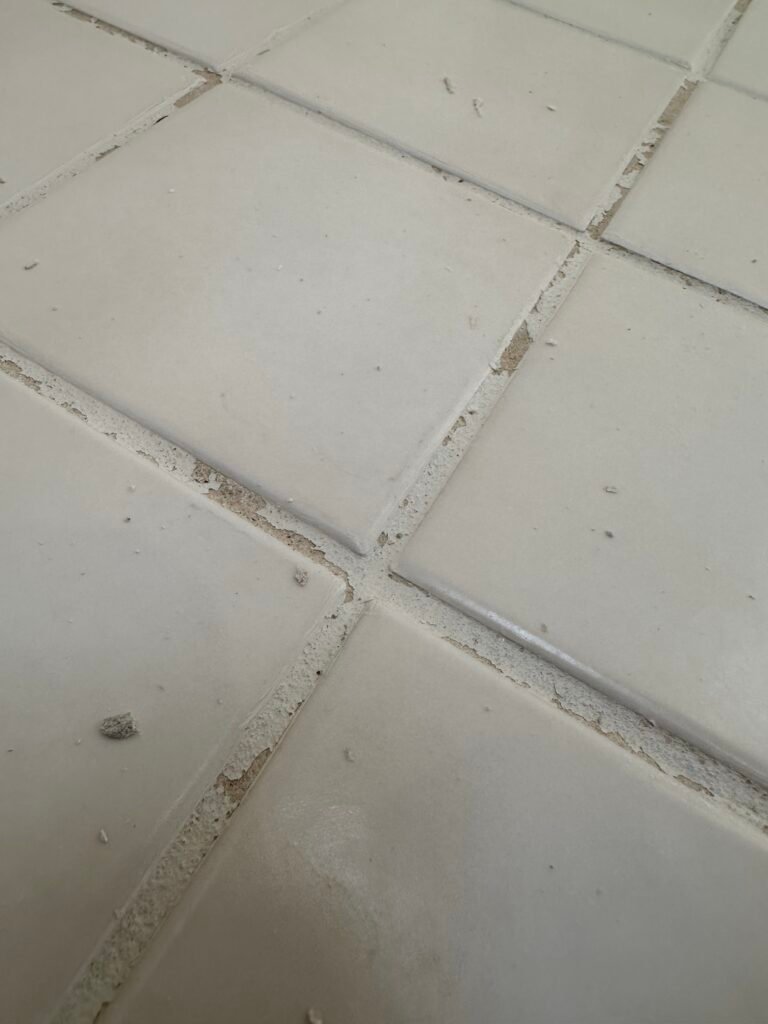
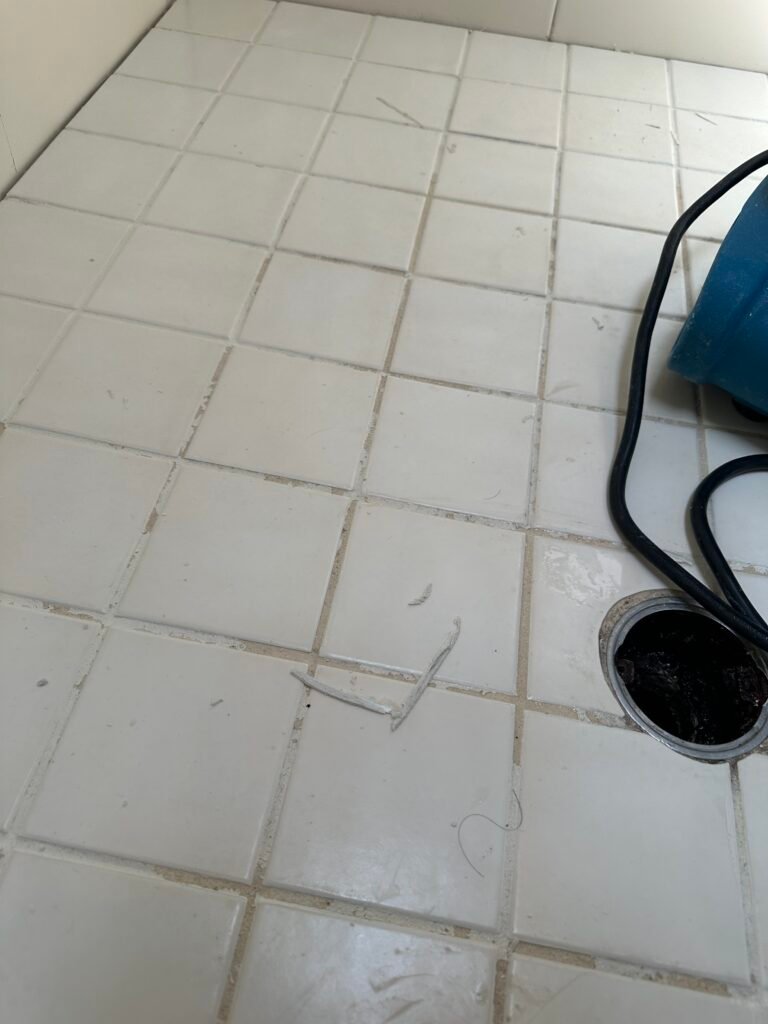
When I arrived at the job site, I began with my standard before-video. At that stage, the shower floor grout appeared merely dirty, so I didn’t think much of it—cleaning the floor is one of the final stages of my process. However, well into the day, when I finally got down on my hands and knees to begin the mechanical scrubbing, I noticed something concerning: the colorant began peeling up. Upon closer inspection, I realized that a significant portion of the floor’s grout was missing underneath a layer of applied colorant. This is a common “shortcut” often used by homeowners looking to freshen up a shower before putting a house on the market, but it is rarely a long-term solution.
Part 3: The Science of Failure—Why Grout Colorant Isn’t a Shower Solution
When homeowners ask me why their shower floor looks “patchy” or why their grout colorant is peeling, the answer comes down to the environment. Grout colorants—essentially pigmented topical coatings—are designed for dry-area floors where moisture exposure is fleeting. In a shower, the environment is fundamentally different.
The Physics of the Failure
Inside a shower, gravity and saturation create a perfect storm for topical products. Prolonged exposure to standing water tests the integrity of any topical bond. All it takes is a microscopic pinhole or a tiny void between the colorant and the porous cement grout for water to force its way in. Once moisture bypasses that surface layer, hydrostatic pressure causes the colorant to lift and bubble, leading to the peeling, flaking mess I frequently encounter.
The “Warranty Gap”
The most telling sign that grout colorant is an unsuitable solution for shower floors is found in the warranties offered by the companies that sell it. Typically, contractors who apply these topical colorants provide a one-year warranty, if they offer one at all. They know the statistics: once the shower is back in daily use, the combination of soap, warm water, and friction will compromise the bond. That one-year timeline is essentially a “wait-and-see” window before the failure becomes the homeowner’s problem.
The Epoxy Advantage: Bonding vs. Coating
I take a different approach. When I perform an epoxy grout repair or skim-coat, I back my work with a five-year workmanship warranty. Unlike colorant, which sits on top of the grout, 100% epoxy grout acts as an adhesive. It bonds at a molecular level to a properly cleaned and etched cement surface, meaning it doesn’t “peel.” By replacing the “lipstick-on-a-pig” paint method with a true epoxy resin, I am providing my clients with a finish that is actually designed to live in a wet environment. Offering a five-year guarantee is my way of standing behind the building science—if the product and the prep-work are both done to the highest professional standard, it shouldn’t need a touch-up in twelve months.
Part 4: The Consultant’s Choice—Honesty Over Upselling
In this particular case, after I walked the client through the findings and presented the options for an epoxy skim coat, the client chose to move forward with the original restoration plan as agreed. It is important to understand that a professional diagnostic process isn’t just about selling more work—it’s about providing the information the homeowner needs to make an informed choice. Because the peeling colorant was primarily a cosmetic issue and not a structural threat to the shower’s waterproofing, the client decided to hold off on the additional cosmetic repair.
I respected that decision. My role is to perform the 6-step restoration we agreed upon to the highest standard, and that is exactly what I did. I completed the deep cleaning, the perimeter silicone replacement, and the structural inspections as originally proposed. My commitment to a job isn’t just about the invoice; it’s about ensuring the client has a full understanding of their shower’s health. Whether a client chooses a full epoxy transformation or opts to maintain their current finish, they can rest easy knowing that the “no-BS” diagnostic work was done, the underlying structure was inspected, and the job was completed with the same level of care and detail that I bring to every project. That is the Grout Repair Pro standard.
Part 5: The Handover—Structural Insights and Long-Term Care
Once the restoration was complete, I brought the client in for the final walkthrough. This is an essential part of my process; it’s when I answer questions and share my observations from behind the scenes.
Proactive Structural Awareness
With over 35 years of experience picking apart almost every type of shower installation, I’ve learned to spot things that aren’t immediately obvious. In this case, while the client was aware of some horizontal structural cracks on the back wall, my inspection revealed identical cracks on the opposite wall at the same three-foot elevation. I identified these as likely signs of house settling or potential issues with the original tile underlayment, which places excessive stress on the tile. Since the tile used was a ceramic base—a material that isn’t particularly strong—it tends to crack under this kind of pressure. I reassured the client that while tile is purely cosmetic and not structural, these cracks are something to monitor. Providing this context doesn’t just add value; it gives the homeowner peace of mind.
The Grout Repair Pro Maintenance Guide
Before leaving, I handed the client my custom maintenance guide, which is included on the back of every work order. This isn’t just a generic sheet; it’s a tailored roadmap that lists the specific grout cleaners, mold removers, glass sealers, and the exact type of grout brush I recommend to keep their shower in peak condition. By the time I head home, the client has a clean, restored shower, a professional assessment of their wall integrity, and a clear plan to maintain the results. Finally, I ask for a review. I’ve found that when a client is truly floored by the transformation—and empowered by the knowledge of how to protect their investment—they are usually happy to share that experience with others. It’s the final step in a job well done.
Hot Mop vs. Sheet Membranes: The Ultimate Shower Waterproofing Breakdown
When you are building or remodeling a high-end custom shower, the most critical design decision happens long before the first piece of porcelain or natural stone is laid. It’s all about how you waterproof the pan. Get this foundation wrong, and water will silently destroy your wood subfloor, rot your framing studs, compromise structural joists, and create a massive mold issue hidden right beneath your feet. Shower floor failures are among the most expensive residential construction defects to remediate, often requiring complete down-to-the-studs tear-outs.
If you live in the Sacramento Valley, chances are incredibly high that your current shower relies on a hot mop pan. From the massive structural building booms of the 1950s through the mid-1990s, hot mopping was virtually the only approved, code-compliant choice for regional homebuilders in areas like Roseville, Folsom, Citrus Heights, and older suburban developments. If your home was built or remodeled during that era, you are living on top of a traditional asphalt sub-pan system right now.
Two major methods dominate the professional tile installation and remodeling market today: traditional Hot Mop Shower Pans and modern Topical Sheet Membranes (such as the Schluter-Kerdi system). Both have passionate defenders among old-school installers and modern building scientists. However, as a professional with over 30 years of hands-on experience in structural shower builds and precision stone restoration across the Sacramento region, I know that the right choice depends entirely on structural preparation, execution, and long-term maintenance requirements. Let’s look at the cold, hard facts behind both waterproofing systems.
Option 1: Traditional Hot Mop Shower Pans
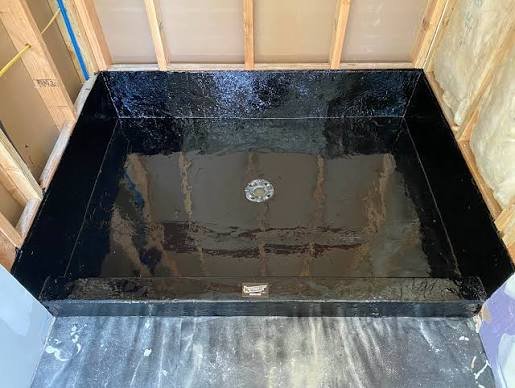
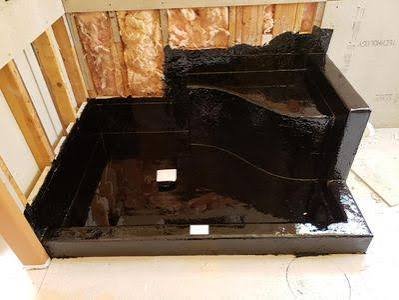
Hot mopping is a classic California tile installation tradition, widely used across the West Coast but rare in other parts of the country. The process involves laying down thick tar paper (felt paper) over the subfloor, installing wire mesh or metal lath along the floor and up the walls to a height of at least three inches above the finished dam, and then skillfully applying multiple alternating layers of molten, hot Type 3 asphalt built up with layers of fiberglass sheeting. The result is a heavy-duty, multi-ply, monolithic barrier applied directly over a sloped base.
A traditional multi-layer hot mop asphalt shower pan base showing a thick, seamless liquid-applied barrier.
The Advantage: It is incredibly tough, rigid, and forgiving of minor subfloor imperfections. Because the asphalt is applied as a hot liquid at temperatures exceeding 400 degrees Fahrenheit, it flows smoothly into every corner, fills voids, wraps perfectly over the curb, and creates a completely seamless, self-sealing membrane. When properly buried under a dense mortar bed, a hot mop pan can withstand immense physical wear and last for decades without degrading.
The Hidden Catch (The Saturated Mud Bed): Hot mop is explicitly classified as a sub-pan waterproofing system. This means your thick cement mortar bed (deck mud) sits on top of the waterproof asphalt layer. Every time you take a shower, water saturates your grout joints, passes entirely through your porous mortar bed, hits the sloped tar liner, and slowly migrates downward to the base of the drain. Consequently, the concrete mud bed beneath your tile remains perpetually damp, functioning as a constant moisture reservoir.
The Anatomy of a “Water-In, Water-Out” System
To understand why traditional builds fail, you must understand how they are engineered to handle water. A traditional shower floor is designed from the ground up to operate as a “water-in, water-out” system. It does not try to stop water at the tile layer; instead, it manages the water that inevitably gets past the tile. When constructed properly according to industry standards, an initial sloped mortar layer (known as the pre-slope) is packed over the wood or concrete subfloor, dropping a mandatory one-quarter inch per linear foot toward the drain. The hot mop liner is then applied directly over this pre-slope. Finally, a secondary thick layer of concrete deck mud (the top slope) is packed over the liner, providing the final surface for tile bonding.
The water-in, water-out layering system beneath the surface tile showing the relationship between pre-slope, liner, and mud bed.
Water will penetrate your wall grout, floor grout, and thin-set mortar. With regular daily use, that subsurface water runs down the vertical waterproofing layer, saturates the horizontal deck mud, and gravity draws it downward toward the collection point. Because this water is migrating entirely below your finished tile line, it cannot enter the top opening of your visible drain grate. To bridge this gap, a specialized three-piece clamping ring drain is required to connect the sub-surface plumbing to the waterproofing liner.
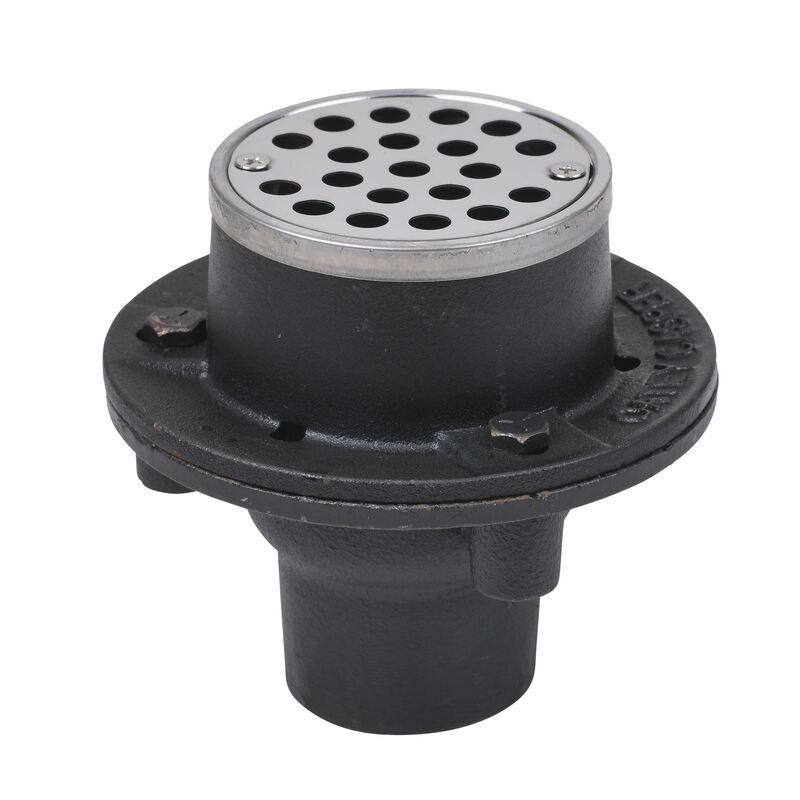
Mechanical diagram of a standard three-piece clamping ring drain with channels leading directly to the built-in weep holes.
A clamping drain works by mechanically sandwiching the hot mop liner between an upper clamping collar and a lower drain flange, secured tightly with bolts. Integrated directly into that upper flange collar are small weep channels that lead to tiny, internal weep holes. These weep holes represent the only exit strategy for the water trapped inside your concrete mud bed. Every time you shower, new water flushes through the tile, pushing the old, sub-surface water out through those channels and safely down into the waste plumbing.
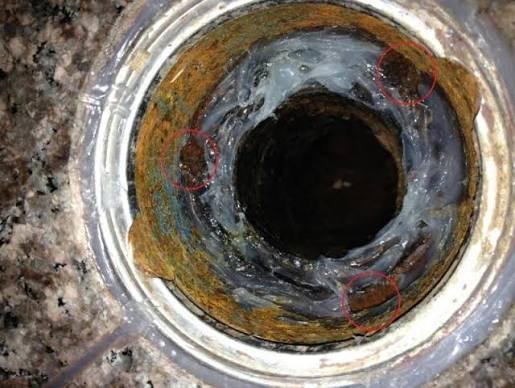
⚠️ The Clogged Weep Hole Disaster: This is the single biggest point of failure in traditional hot mop builds. If the original installer failed to place a protective layer of pea gravel or a dedicated weep-hole protector around the drain base before packing the deck mud, the raw concrete mix blocks the holes immediately. Over years of use, soap scum, hair, body oils, skin cells, and hard water lime scale pack into those channels, choking them off completely. Once blocked, the sub-surface water has nowhere to go. It sits stagnant inside the concrete mud bed, turning your shower floor into a hidden underground swamp that breeds deep bacteria, erodes tile thin-set, and emits a foul, sour, musty mold smell that you can never seem to scrub away from the surface.
A close-up look inside a real-world three-piece drain flange where sub-surface weep holes often clog without regular maintenance.
Option 2: Modern Topical Sheet Membranes
Topical sheet membranes represent the modern building science evolution of tile installation. Instead of burying the critical waterproofing layer at the very bottom under inches of heavy concrete mud, a pliable, thin, engineered waterproof fabric sheet membrane—typically made of polyethylene with fleece webbing laminated to both sides—is adhered directly to the surface of a single, cured mortar bed or a pre-fabricated high-density foam tray. This installation utilizes highly specialized thin-set mortar to form a solid bond.
The Advantage: This is a true topical waterproofing system. Water never touches your underlying mortar bed or structural sub-floor. The moment moisture passes through your tile joints or grout lines, it hits the sheet membrane and is immediately directed straight down into a integrated bonded flange drain. Because the entire assembly dries out completely between uses, the structural risk of deep-seated saturation, blocked weep holes, efflorescence (white mineral crusts), and musty odors is completely eliminated. It creates a far more sanitary environment.
The Hidden Catch: It demands absolute installation perfection. Unlike a hot mop system which self-levels and fills its own structural voids, sheet membranes require meticulous, high-precision craftsmanship. The tile installer must tightly wrap corners, ensure perfect seam coverage with exact two-inch overlaps, and use the correct modified or unmodified thin-set mortars according to strict manufacturer specifications to guarantee a 100% waterproof bond. If an inexperienced installer leaves a single air void, creates a pinhole, or fails a corner fold, the entire system can compromise and leak immediately upon use.
Deep Technical Analysis: Crucial Differences Every Homeowner Must Know
To fully evaluate these two technologies for a long-term investment, we must look past the marketing and examine how they perform under real-world structural stresses over time. Both systems have vastly different impacts on your home’s framing and overall performance.
1. Structural Weight and Ceiling Sag: A traditional hot mop build requires a pre-slope mortar bed, the asphalt membrane itself, and a thick secondary mortar bed. This assembly can easily total 2 to 3 inches of solid concrete, translating to roughly 25 to 30 pounds of dead weight per square foot. On a ground-floor concrete slab, this weight is negligible. However, on a second-story bathroom remodel or an older home with undersized joists, this massive load can cause subfloor deflection, leading to ceiling sag below and cracked grout lines above. Topical sheet membranes can be installed over much thinner beds or lightweight foam trays, minimizing dead weight.
2. Structural Movement and Shear Stresses: Wood framed homes constantly expand, contract, and shift with seasonal humidity and temperature changes—especially in the Sacramento region, where we swing from damp winters to scorching summers. A hot mop system handles movement through sheer mass; the thick mud bed floats independently over the tar paper layer. A topical sheet membrane relies on engineering. The flexible polyethylene sheet acts as an uncoupling layer, absorbing lateral movement and shear stresses so that structural shifting doesn’t transfer directly into your brittle tile or stone surface, preventing cracked tiles.
3. The Mandatory 24-Hour Flood Test: Regardless of which system you choose, the plumbing code mandates a 24-hour flood test before any tile can be installed. This involves plugging the drain assembly and filling the shower pan with water up to the top of the curb, letting it sit to verify structural integrity. Testing a hot mop pan is straightforward because the asphalt is thick and tough. Testing a sheet membrane requires careful inspection of every single seam. If a leak occurs, tracing the path of water under a sheet membrane can be highly difficult, whereas a hot mop failure usually points directly to an unsealed plumbing connection or a framing puncture.
Side-by-Side: The Structural Comparison
Feature
Traditional Hot Mop
Modern Sheet Membrane
Waterproofing Level
Sub-pan (Concrete sits on top of the waterproof layer).
Topical (Protects the concrete bed completely).
Mold / Odor Risk
High if weep holes clog. Stagnant water creates trapped mold smells.
Extremely Low. No thick mud bed to trap standing water.
Installation Risk
Thick and forgiving, but emits heavy, foul asphalt fumes.
Requires absolute precision, crisp folds, and zero voids.
Weight/Build
Adds significant weight and thickness to the floor structure.
Lightweight, engineered fabric system.
Drying Time
Slow. The mud bed remains saturated long after use.
Rapid. Surface water drains and evaporates quickly.
Subfloor Suitability
Excellent for concrete slabs; heavy for wood joists.
Ideal for all subfloors, including upper stories.
The Professional Verdict
Hot mop has stood the test of time and remains a robust option for heavy-duty, ground-floor residential construction where structural mass isn’t an issue. However, it belongs to an older era of building engineering when thick, saturated mud beds were the only option available. Modern topical sheet membranes offer a cleaner, faster-drying, lighter, and far more sanitary shower environment—if and only if they are installed by a certified tile professional who respects the strict manufacturing tolerances and installation guidelines required for a perfect bond.
Building a new shower or fixing a musty, failing pan? Don’t guess on your structural waterproofing system or live with trapped mold odors that ruin your indoor air quality. At Grout Repair Pro, we bring over 30 years of hands-on structural tile and restoration experience to every single residential project. In fact, Step 5 of our signature 6-Step Shower Restoration Process is dedicated entirely to deep internal drain clearing, mechanical weep hole clearing, and targeted flush testing to ensure your traditional system breathes and drains exactly the way it was engineered to from the factory.
Whether your custom bathroom project demands a traditional multi-layer hot mop restoration or a modern engineered topical fabric membrane system, we make sure your installation is built like an absolute fortress against water damage. Contact Grout Repair Pro today to discuss your specific shower project and schedule your professional onsite consultation!
Why Failing Silicone in a Piedrafina Shower is a Hidden Disaster (and How We Fix It)
When it comes to modern shower design, engineered stone slabs like Piedrafina are an excellent choice. Because they come in large, continuous panels, you get a beautiful, high-end look with a massive advantage: no grout lines on the walls, and seams only in the corners.
But while solid surface slabs eliminate 95% of traditional shower seams, that remaining 5% is a critical vulnerability. If the silicone in those corners fails, you have a major problem hiding right out of sight.
The Hidden Danger Behind the Slab
In a perfect world, every contractor would completely waterproof the walls behind a slab before installing it. In reality? It is not always standard practice. Many installers apply slab panels directly over standard drywall.
Drywall is a Paper Product: Drywall is made of paper and gypsum. Paper loves to absorb water.
The Structural Threat: Drywall is fastened directly to wood studs.
The Breach: If there is even a tiny pinhole, void, or crack in your corner silicone, water will get behind that Piedrafina panel.
Once water gets back there, it immediately starts attacking the drywall and transferring moisture straight into the wood framing. Because the slab hides the wall, you won’t see the wood rotting or the mold growing until the structural damage is already severe. This risk is highest down low, right where the shower floor meets the walls, where water pools and sits constantly.
Check out the final, flawless results of our specialized resealing process in this quick video overview:
Our 7-Step Restoration & Silicone Replacement Process
You cannot just squirt new silicone over a failing joint and call it a day. If the surface isn’t completely decontaminated and bone-dry, the new silicone won’t bond, and it will fail within months.
Before a single drop of new silicone touches the shower, it undergoes our strict, professional protocol:
Step 1: Complete Mold Removal
We begin by treating and eradicating mold throughout the entire shower enclosure to ensure we are working on a healthy, sanitary surface.
Step 2: Glass & Frame Detailing
Next, we clean and polish the shower glass to remove stubborn hard water spots and completely detail the metal frame, restoring its original clarity.
Step 3: Mechanical Soap Scum Removal (The Razor Test)
This is where standard DIY methods fail. There is no chemical cleaner on the market that can genuinely dissolve heavy soap scum. The only way to truly remove it is mechanical. We use a brand-new razor blade to meticulously scrape the Piedrafina walls and floor, checking every inch for hidden deposits—especially down low near the floor.
Step 4: Heavy-Duty Final Wash
Only after the heavy soap scum has been physically shaved off with the razor blade do we introduce our heavy-duty cleaners. This final wash removes any microscopic residue, leaving the engineered stone perfectly clean.
Step 5: High-Powered Forced Drying
Silicone will absolutely not stick to water. Even if a surface looks dry on the outside, moisture remains trapped deep inside the corner seams. We deploy heavy-duty air-moving machines and let them run for an extended period, thoroughly extracting all moisture from the joints before proceeding.
Step 6: Meticulous 100% Silicone Application
For this Piedrafina shower, we are applying a professional-grade, standard 100% White Silicone.
Unlike cheap acrylic caulks that can be easily wiped up with water, 100% silicone is notoriously difficult to work with. Water will not clean it up; trying to do so creates an absolute nightmare. Getting a full, deep bead that stops water from getting behind the seams—while keeping a perfectly tight, clean, professional line—requires years of practice, specific technique, and immense patience.
The Professional Difference: Silicone vs. Cheap Caulk
Feature
100% Professional Silicone
Cheap Acrylic / Latex Caulk
Flexibility
High (Like a rubber band). Moves with your home’s natural expansion and contraction without tearing.
Low. Shrinks and cracks in a short period under shifting walls.
Waterproofing
100% Waterproof. Completely secures the surface. Used by professional glass enclosure installers.
Poor. Water breaks it down over time, letting moisture pass through.
Application
Highly meticulous. Demands specialized tools and technique. Cannot be cleaned with water.
Easy to apply and cleans up with water, but fails quickly in wet environments.
A Note on Maintenance: Even though 100% silicone is the highest quality material available and resists moisture, it is not 100% mold-proof. If soap residue and standing water are allowed to sit on the bead, mold will eventually grow on top of it. Once our job is complete, we take the time to educate our customers on the exact steps needed to maintain their fresh seals for years to come.
The Bottom Line: Don’t let a failed corner seam ruin a beautiful, high-end shower installation. If you notice gaps, peeling, or black spots in your shower corners, let the professionals handle it right the first time.
Step 7: The Final Cure & Client Handover
Once the new 100% white silicone is perfectly in place, the final phase of our restoration process is all about patience.
The 24-Hour Cure Rule: It is critical to keep the shower completely dry for a minimum of 24 hours. Silicone requires this time to properly cure and bond to the Piedrafina panels. Introducing moisture too early will ruin the seal before it even has a chance to protect your walls.
A Spotless Finish: We pride ourselves on clean execution. We meticulously clean up our entire work area, leaving your bathroom cleaner than the way we found it.
The Handover & Maintenance Guide: The final thing we do before leaving is sit down with you to review exactly what has been completed. We will explain our process and leave you with our exclusive maintenance guide. This guide outlines exactly which products to use—and how to use them—so you can keep your newly restored shower looking exactly the way we left it for years to come.
Ready to Protect Your Investment?
Don’t let a tiny void in your silicone lead to hidden structural damage behind your engineered stone panels. If your shower seams are showing signs of age, peeling, or mold, let the professionals handle it right the first time. Contact Grout Repair Pro today to schedule your professional shower restoration and get your hands on our exclusive maintenance guide!
Bonus: Get Our Exclusive Shower Maintenance Guide
Want to ensure your newly restored shower stays pristine for years to come? We don’t just fix your tile, stone, and silicone—we help you protect it. We have compiled our 30+ years of professional field experience into a straightforward, step-by-step maintenance guide that shows you exactly which products to use (and which ones to avoid at all costs) to prevent mold, soap scum, and hard water buildup.
This exclusive guide is provided free to every single customer at the end of our restoration process. However, if you are looking to tackle your own maintenance and want a copy sent straight to your inbox, just drop us a line below!
Project Showcase: Professional Shower Mold Remediation & Restorations
Project 3: Premium Travertine Natural Stone Restoration
Before: Deep mold embedded into custom travertine surfaces and corners.After: Fully remediated, detailed, and deep-penetrated protective seal.
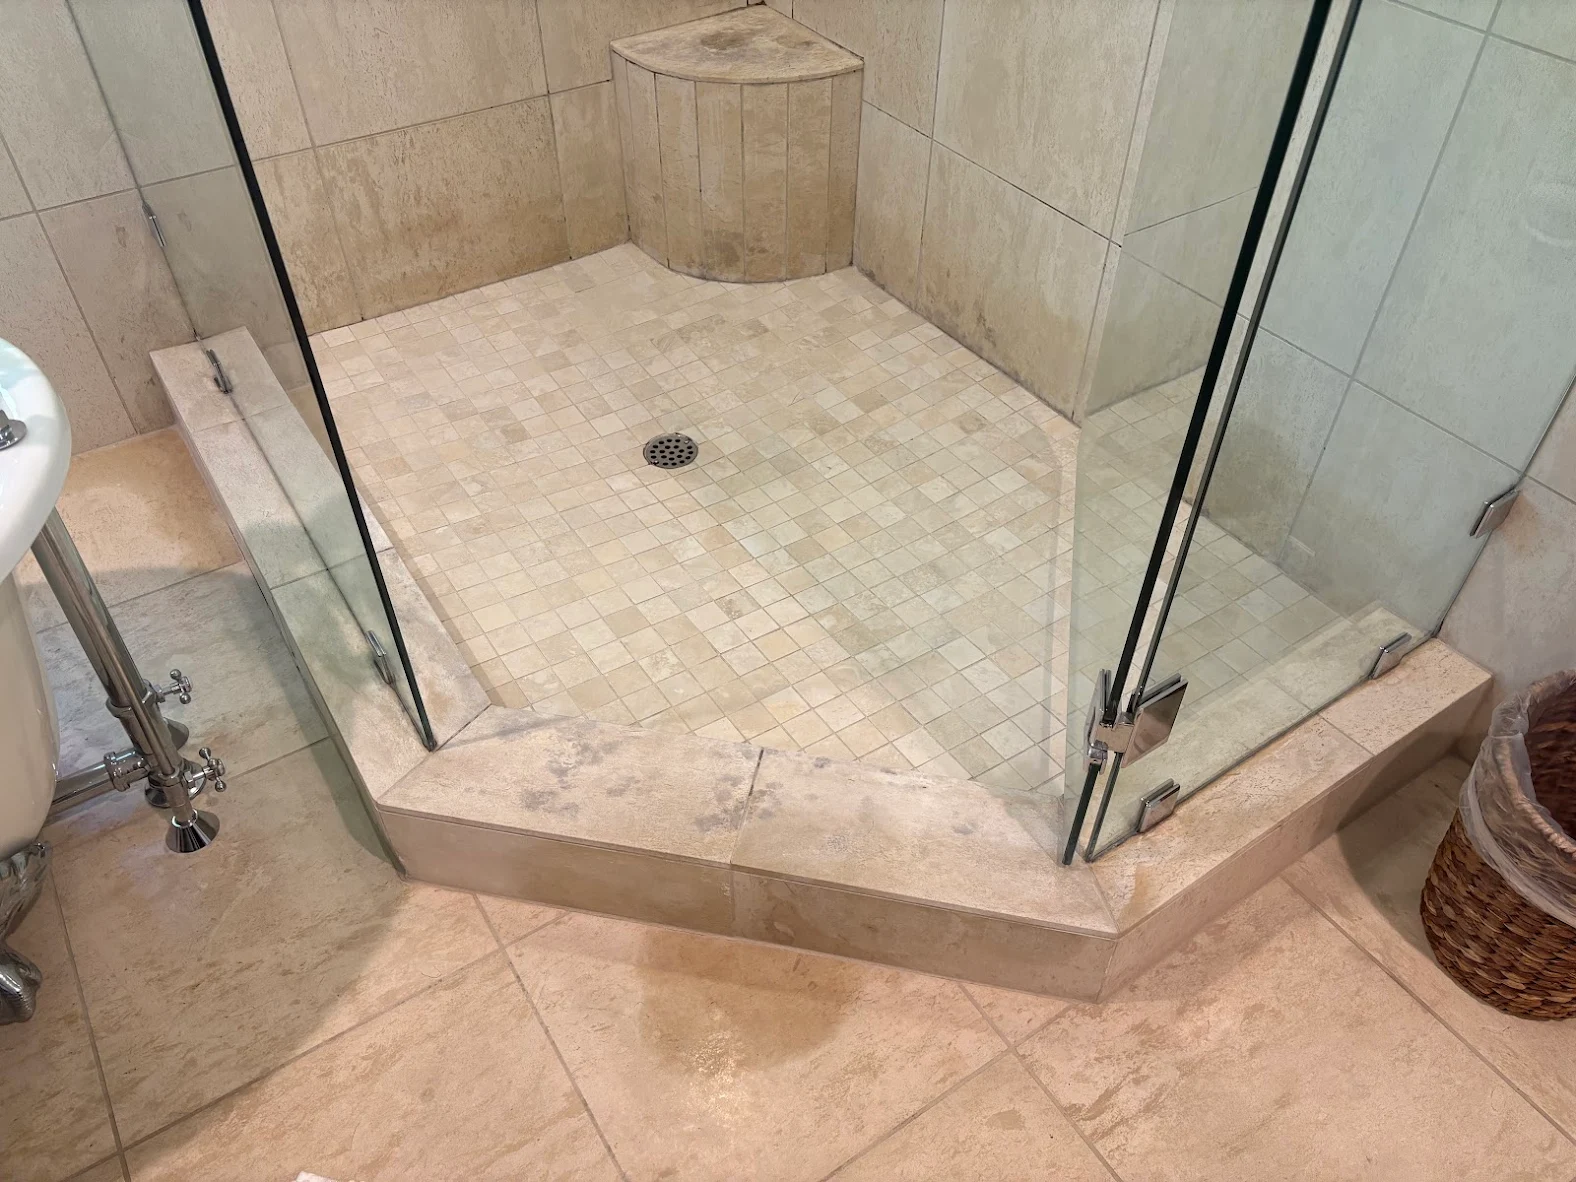
The Challenge: Travertine is a gorgeous natural stone, but because it is a calcium-based material, it requires highly specialized care. While it adds an elegant, high-end touch to a home, keeping it pristine is a multi-layered challenge. First, natural stone is naturally porous; it has to “breathe,” meaning penetrating sealers can only slow down moisture absorption rather than fully waterproofing it. This vulnerability easily allows mold to take root over time. Second, being calcium-based makes it extremely sensitive. Using standard acidic bathroom cleaners will chemically react with the stone, permanently etching and ruining the surface glaze. Hard water minerals like calcium can also build up within these pores, further degrading the look. Protecting natural stone demands rigorous routine maintenance and stone-safe chemistry.
The Restoration: Mold frequently compromises travertine showers, particularly on horizontal surfaces like built-in shower seats where water pools instead of being squeegeed or wiped dry. Our plan of attack required a heavy commercial mold remediation treatment, applying four successive rounds to guarantee the solution pulled deep into the stone matrix. Stripping heavy layers of embedded soap scum can only be achieved effectively by hand-scraping with a razor blade—no liquid chemical can replicate that clean finish. After meticulously scraping the stone without scratching the face, we utilized a heavy-duty, stone-safe cleaning agent featured in our Shower Restoration Standards to pull out the remaining grime. Because professional-grade remediation compounds generate high fumes, we execute this process utilizing professional air scrubbing machines and active ventilation. As you can see, our comprehensive 6-Step Process for natural stone is far more extensive than basic ceramic or porcelain care, finishing with a premium deep-penetrating sealer to safeguard the travertine for years to come.
Designer Endorsement & Quality Standards
High-end custom tile projects require absolute precision. Using the wrong acidic cleaners or aggressive scraping tools can easily etch natural stone or scratch premium porcelain glazes, ruining an expensive installation.
“As an interior designer, I am highly selective about the methods, care, and products used by contractors on my projects. Grout Repair Pro’s precise restoration process preserves the beauty of high-end tile while completely eradicating complex mold and structural vulnerabilities. They are my trusted choice for professional maintenance.”
Executing a professional shower restoration is often about far more than just fixing cosmetic nuisances; it requires uncovering the profound structural stories hidden behind the tile. When water starts escaping an enclosure, it is almost always a sign of subsurface movement, shifting perimeters, or foundational settling.
A recent client in Folsom reached out after noticing persistent moisture on their bathroom floor. They had tried superficial fixes, but the root cause required a deep diagnostic. This property presented an incredible teaching moment: the intersection of unstable foundation soils, a heavy tile roof, structural settlement, and an installation that was physically moving under pressure. Here is how we used our specialized knowledge to stabilize the shower, engineer around structural movement, and save the client thousands of dollars compared to a complete demolition.
The Diagnostic: Structural Settlement vs. Material Failure
This project required us to look far beyond the tile surface. The original homeowner was highly knowledgeable about the history of the property, which gave us critical context: the house was likely built on improperly compacted, unsound soil. Combined with the immense weight of a heavy concrete tile roof, gravity has spent years pushing down through the framing walls, transferring immense stress directly into the bathroom architecture.
In fact, the foundation itself was cracking, and the bathroom floor had three cracked tiles replaced within the very first year of construction. On this specific Folsom project, our diagnostic tracked this structural stress through three distinct areas:
The Back Wall Shear Line: A distinct structural crack traveled straight down the middle of the back tile wall, mirroring a foundation stress fracture underneath.
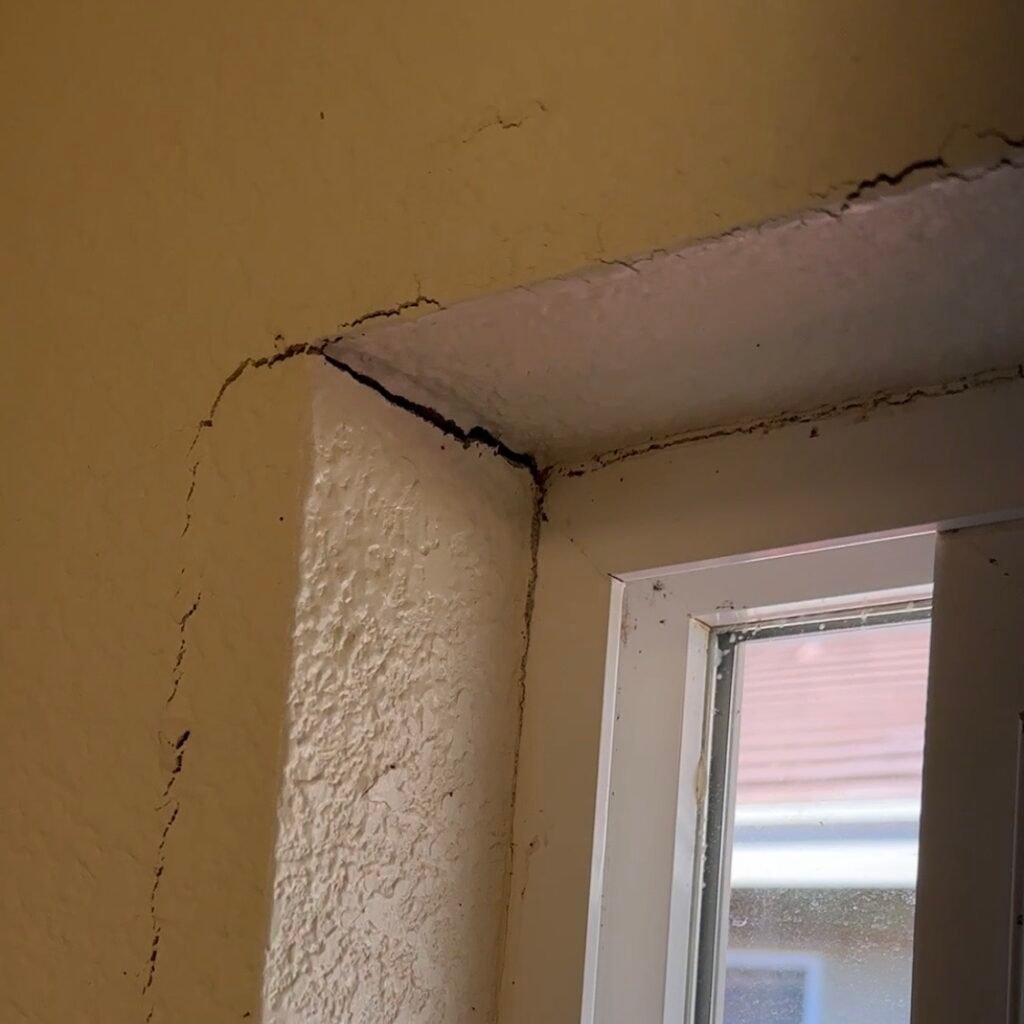
Stress Cracks Around the Window: The drywall framing surrounding the shower window featured deep stress cracks, proving the wall cavity is actively compressing under structural load.
Deteriorated Enclosure Seals: Under this constant pressure, the original rigid cement grout lines and perimeter silicone fractured, acting like a funnel that channeled water behind the walls and outside the glass enclosure.
Before Restoration Conditions
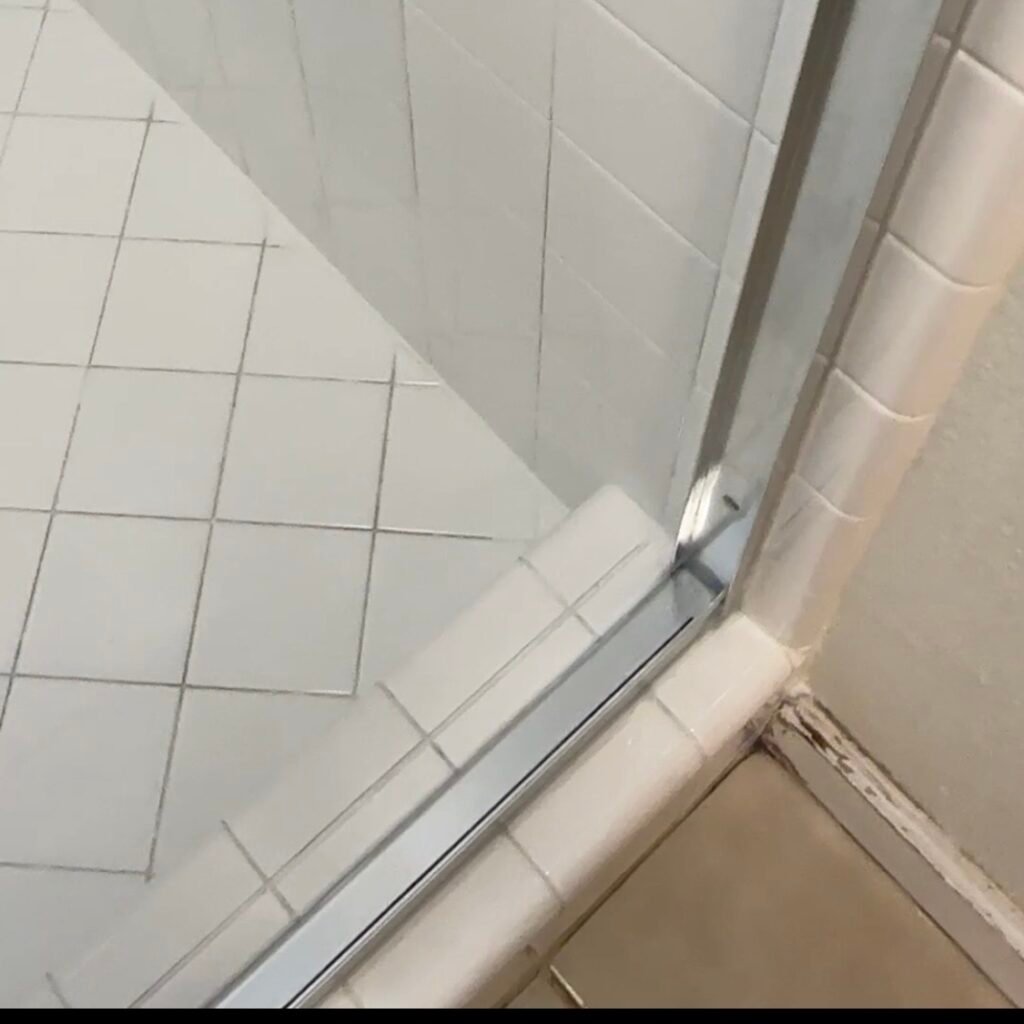
Our restoration package includes lower glass channel removal to allow for full mold and fungus remediation.
Before: Shower lower metal channel was removed in order to professionally remove all the mold.Before: Typical damaged and missing grout at shower floor perimeter allows water to easily get under shower floor.
Watch the Complete Before & After Transformation
Our 6-Step Shower Restoration Process in Action
To properly address a structurally compromised shower, you cannot just slap new caulking over shifting joints. We executed our meticulous technical protocol to seal the system while keeping its unique structural quirks in mind:
Advanced Mold Remediation Before addressing the visible structures, we applied our commercial-grade remediation agents. This step kills active mold spores on contact, neutralizing subsurface growth hidden deep within the failed grout channels.
Glass Enclosure Cleaning & Restructuring (The Track Pull) What truly separates us from standard competitors is our thoroughness: we completely remove the bottom track of the glass enclosure. Metal shower tracks are absolute havens for stagnant water and deep mold growth that surface cleaning can never reach. By pulling the track, we sanitize the hidden tile face and prep the channels for a completely pristine rebuild.
Tile & Grout Cleaning and Mechanical Extraction We completely cut out and ground away the top layer of compromised, soft cement grout. Using specialized stainless steel brushes, we deep-clean the tile and excavate down to an entirely clean, stable substrate, ensuring no underlying mold could contaminate our new materials.
100% Silicone Perimeter Replacement With the metal tracks pristine and the tile bone-dry, we reinstalled the framework and sealed all movement joints using premium, high-adhesion 100% silicone. This creates a flexible, completely watertight barrier that stops water from traveling outward.
Drain Alignment & Cleanout We opened up the drain assembly to clear out soap scum, mineral scale, and hair buildup. Ensuring that the primary drain and sub-drain weep holes flow freely prevents water from backing up and putting pressure on the tile floor boundaries.
Tile & Grout Repair (100% Epoxy Injection) For the shower floor perimeter repair, we bypassed standard cement. We packed the prepped joints with 100% epoxy grout. The existing shower floor grout was borderline needing a full regrout, but the customer opted to save money by having us structurally seal and secure the critical planes rather than pursuing an extensive teardown. Because epoxy is entirely non-porous and chemically dense, it cannot absorb water, making it structurally superior and highly resilient against future leaks.
Completed Restoration Results
Everything cleaned and repaired. The shower floor could have used a regrout but customer chose to keep it unchanged.
The End-of-Day Surprise: Detecting Subsurface Floor Movement
structural movement pushing down on weak foundation causing cracks down wall.
At the very end of the day, while applying the advanced white epoxy grout to the shower floor perimeter, we discovered a major twist. Under the physical weight of my arms pressing down on the floor during application, we detected slight vertical movement in the actual tile floor at the perimeter joint.
What does this mean technically? It means either the thick traditional mortar bed or the deck mud beneath the tile has broken free from the underlying hot mop waterproofing membrane and is now free-floating. The historical lack of solid ground stability under the foundation combined with crushing overhead weight is almost certainly the culprit.
Is this an installation failure? Technically, yes. However, a structural failure does not always mean an emergency teardown. As long as the hot mop membrane below remains intact, holds water, and keeps moisture inside the shower envelope, a full remodel isn’t immediately required.
Because the client wants to avoid spending a massive sum on a premature gut remodel, the engineering strategy is to monitor it closely. If the floor-to-wall joint experiences excessive shifting, we must adapt our approach:
The Epoxy Dilemma: High-performance epoxy grout is structurally bulletproof and resists mold beautifully, but it has zero flexibility. If a joint moves, rigid epoxy will eventually crack.
The Silicone Solution: Premium 100% silicone acts like a rubber band, easily flexing with structural movement without breaking its seal. The catch? Silicone is far more susceptible to surface mold growth if the shower isn’t allowed to dry out completely between uses.
Our Structural Engineering Strategy: We sealed the shifting perimeter with premium materials to secure immediate water protection. Moving forward, if foundation movement forces a split, we will swap the rigid joints for ultra-flexible 100% silicone to act as a structural shock absorber.
Pro Tips for Managing a Shifting Shower
If your home sits on unstable soil or shows signs of structural settlement, your tile maintenance routine requires specific adjustments:
The Bi-Weekly Flush & Dry: Because a moving floor bed may require flexible silicone transitions, keeping the shower dry is non-negotiable. Spend 5 minutes every two weeks flushing the joints with a grout-safe neutral cleaner, and utilize a quick squeegee or run an exhaust fan to deny mold the moisture it needs to cling to flexible seals.
Monitor the Floor-Wall Plane: Once a month, take a close look at the perimeter joint where the floor meets the wall. If you see hairline fractures appearing in the grout line, it’s a sign that structural movement is active and it’s time to bridge that joint with a rubberized 100% silicone transition.
Watch the External Threshold: Keep a close eye on the drywall and flooring immediately outside the shower enclosure. Catching subtle structural water migration early protects your home’s framing before it requires catastrophic structural remediation.
For more detailed maintenance strategies or to look up specific product recommendations that keep your restored tile looking like new, visit our comprehensive FAQ Section.
When a homeowner reached out for a professional shower restoration in the Sacramento area, they were at their wits’ end. Their 40-year-old shower had become impossible to keep in a healthy, sanitary state. They had already tried several different retail cleaners with zero success because the issues weren’t just on the surface—the mold had deeply penetrated the system.
Here is how we used our specialized 6-Step Restoration Process to save this classic shower, eliminate the health hazards, and save the client thousands of dollars compared to a $20,000 full remodel.
The Diagnostic: Anatomy of a 40-Year-Old Shower
Older showers built around a traditional “Hot Mop” waterproofing system operate on a “water-in, water-out” design. Because conventional cement grout is naturally porous, water saturates the tile floor and sits on top of the sub-surface waterproofing membrane.
On this specific job, we diagnosed several critical failure points:
The 3/16″ Spread Grout Joints: The 4-inch square tiles featured wide 3/16-inch joints. Over four decades, these wide, porous cement joints became a massive breeding ground for deep-seated mold.
Stained and Failed Silicone: The glass enclosure silicone was completely infested with mold. Once mold embeds itself inside silicone, the material is permanently stained and must be entirely cut out and replaced.
Clogged Weep Holes: A critical red flag in hot mop systems. Weep holes are located 2 inches down inside the drain assembly. If they get choked with debris, the subsurface water gets trapped. This stagnant water creates a constant vapor drive that forces mold up through the grout lines and destroys the installation from the inside out.
Our 6-Step Shower Restoration Process in Action
This project required nearly 8 hours of highly targeted technician labor to properly execute our signature protocol:
Advanced Mold Remediation We applied a commercial-grade remediation product that kills mold spores within 60 seconds. Due to the deep contamination in the 3/16″ spread joints, this required multiple sequential applications to completely neutralize the subsurface growth.
Mechanical Grout Preparation Surface washing isn’t enough. We utilized specialized stainless steel brushes to physically scrub and grind away the top layer of damaged, mold-stained cement grout. This exposed a completely fresh, stable layer of clean grout underneath without risking rust stains from inferior metal tools.
Glass Enclosure Restructuring All old, mold-compromised silicone around the glass enclosure and tile transitions was mechanically removed. We thoroughly sanitized the tracks and prepped the channels for re-sealing.
Drain & Weep Hole Clearing We stripped out the drain cover and excavated accumulated debris exactly 2 inches below the shower floor level. Clearing these vital weep holes instantly restored the “water-in, water-out” functionality, ensuring the pan can drain completely and dry out between uses.
High-Performance Grout Repair For all structural grout repairs, we don’t use standard cement base. We packed the joints with 100% epoxy grout. 100% epoxy is completely waterproof, chemically resistant, and structurally far superior to cement.
100% Silicone Perimeter Seal We sealed all movement joints and glass transitions using premium 100% silicone. This provides a highly flexible, completely watertight seal that won’t shrink or break down like cheap acrylic caulks.
The Hard Truth About Grout Sealers & Mold
There is a massive misconception among homeowners that grout sealers make grout waterproof or mold-proof. This is completely false.
By design, grout needs to “breathe” to allow vapor and subsurface moisture to escape. Penetrating sealers are engineered specifically to allow this breathability process to happen, meaning it is physically impossible for a sealer to make cement grout waterproof.
Furthermore, epoxy grout is not immune to mold—and the reality is, nothing is. If organic matter like soap scum and skin cells sits on a surface with moisture, mold will grow on it, whether it’s plastic, tile, cement, or epoxy.
Cure Time & Return to Service: The shower was fully prepped, executed, and delivered in under 8 hours. The shower was cleared for full use exactly 24 hours later to allow the advanced 100% epoxy grout and 100% silicone to fully cure and achieve maximum strength.
Pro Tips for Maintaining an Older Shower
At the final walkthrough, we always leave our Sacramento area clients with a clear roadmap to keep their restored shower looking pristine without spending hours scrubbing:
The 5-Minute Maintenance Rule: The absolute key to protecting your professional shower restoration and stopping mold from returning is to maintain and clean your shower every two weeks. You don’t need heavy chemicals or intense scrubbing. All it takes is a purpose-made grout cleaner that is safe on grout, a small nylon grout brush, and 5 minutes of your time.
The Ultimate Key: Dry It Out: The single most effective thing you can do is get that shower to dry out completely before the next use. Just a reality—mold cannot survive without moisture. Tips like running an exhaust fan longer or utilizing a quick squeegee after the final shower of the day dramatically cuts down the humidity levels that spores need to activate.
Understand Stained Silicone: If you see black mold spots creeping behind or inside your silicone, surface sprays won’t fix it. The silicone is permanently damaged and requires professional replacement.
For a deeper dive into the specific products we recommend, step-by-step instructions on how to use them, and how to check your tile for invisible soap scum to make sure you are cleaning thoroughly, check out our dedicated FAQ Section.
When a homeowner reached out for a professional shower restoration in the Sacramento area, they were at their wits’ end. Their 36-year-old shower had become impossible to keep in a healthy, sanitary state. They had already tried several different retail cleaners with zero success because the issues weren’t just on the surface—the mold had deeply penetrated the system.
Here is how we used our specialized 6-Step Restoration Process to save this classic shower, eliminate the health hazards, and save the client thousands of dollars compared to a $20,000 full remodel.
The Diagnostic: Anatomy of a 36-Year-Old Shower
Older showers built around a traditional “Hot Mop” waterproofing system operate on a “water-in, water-out” design. Because conventional cement grout is naturally porous, water saturates the tile floor and sits on top of the sub-surface waterproofing membrane.
On this specific job, we diagnosed several critical failure points:
The 3/16″ Spread Grout Joints: The 4-inch square tiles featured wide 3/16-inch joints. Over four decades, these wide, porous cement joints became a massive breeding ground for deep-seated mold.
Stained and Failed Silicone: The glass enclosure silicone was completely infested with mold. Once mold embeds itself inside silicone, the material is permanently stained and must be entirely cut out and replaced.
Clogged Weep Holes: A critical red flag in hot mop systems. Weep holes are located 2 inches down inside the drain assembly. If they get choked with debris, the subsurface water gets trapped. This stagnant water creates a constant vapor drive that forces mold up through the grout lines and destroys the installation from the inside out.
Before Restoration Conditions
Severe mold and fungus accumulation embedded deep within the track, creating sanitary and health issues.Showing excessive mold growth that completely destroyed the integrity of the silicone perimeter seals, requiring total replacement.Recessed shampoo niches are notorious for water pooling, leading to failing grout lines and hidden leaks.
Our 6-Step Shower Restoration Process in Action
This project required nearly 8 hours of highly targeted technician labor to properly execute our signature protocol:
1. Advanced Mold Remediation
We applied a commercial-grade remediation product that kills mold spores within 60 seconds. Due to the deep contamination in the 3/16″ spread joints, this required multiple sequential applications to completely neutralize the subsurface growth.
2. Mechanical Grout Preparation
Surface washing isn’t enough. We utilized specialized stainless steel brushes to physically scrub and grind away the top layer of damaged, mold-stained cement grout. This exposed a completely fresh, stable layer of clean grout underneath without risking rust stains from inferior metal tools.
3. Glass Enclosure Restructuring
All old, mold-compromised silicone around the glass enclosure and tile transitions was mechanically removed. We thoroughly sanitized the tracks and prepped the channels for re-sealing.
4. Drain & Weep Hole Clearing
We strip out the drain cover and excavated accumulated debris exactly 2 inches below the shower floor level. Clearing these vital weep holes instantly restored the “water-in, water-out” functionality, ensuring the pan can drain completely and dry out between uses.
For all structural grout repairs, we don’t use standard cement base. We packed the joints with 100% epoxy grout. 100% epoxy is completely waterproof, chemically resistant, and structurally far superior to cement.
6. 100% Silicone Perimeter Seal
We seal all movement joints and glass transitions using premium 100% silicone. This provides a highly flexible, completely watertight seal that won’t shrink or break down like cheap acrylic caulks.
Completed Restoration Results
Leaky glass enclosure with faulty silicone was allowing water to escape.100% clear silicone applied to entire glass enclosure resulting in waterproof protection.Drain grate removed, the 3 weep holes cleared, and drain section cleaned removing soap scum, hair, and calcium deposits.
The Hard Truth About Grout Sealers & Mold
There is a massive misconception among homeowners that grout sealers make grout waterproof or mold-proof. This is completely false.
By design, grout needs to “breathe” to allow vapor and subsurface moisture to escape. Penetrating sealers are engineered specifically to allow this breathability process to happen, meaning it is physically impossible for a sealer to make cement grout waterproof.
Furthermore, epoxy grout is not immune to mold—and the reality is, nothing is. If organic matter like soap scum and skin cells sits on a surface with moisture, mold will grow on it, whether it’s plastic, tile, cement, or epoxy.
Cure Time & Return to Service: The shower was fully prepped, executed, and delivered in under 8 hours. The shower was cleared for full use exactly 24 hours later to allow the advanced 100% epoxy grout and 100% silicone to fully cure and achieve maximum strength.
Pro Tips for Maintaining an Older Shower
At the final walkthrough, we always leave our Sacramento area clients with a clear roadmap to keep their restored shower looking pristine without spending hours scrubbing:
The 5-Minute Maintenance Rule: The absolute key to protecting your professional shower restoration and stopping mold from returning is to maintain and clean your shower every two weeks. You don’t need heavy chemicals or intense scrubbing. All it takes is a purpose-made grout cleaner that is safe on grout, a small nylon grout brush, and 5 minutes of your time.
The Ultimate Key: Dry It Out: The single most effective thing you can do is get that shower to dry out completely before the next use. Just a reality—mold cannot survive without moisture. Tips like running an exhaust fan longer or utilizing a quick squeegee after the final shower of the day dramatically cuts down the humidity levels that spores need to activate.
Understand Stained Silicone: If you see black mold spots creeping behind or inside your silicone, surface sprays won’t fix it. The silicone is permanently damaged and requires professional replacement.
For a deeper dive into the specific products we recommend, step-by-step instructions on how to use them, and how to check your tile for invisible soap scum to make sure you are cleaning thoroughly, check out our dedicated FAQ Section.